
Before I moved into my rental home I sold my kitchen table. It was the second one that I had in my previous apartment and I never used either one of them, always opting to sit at the kitchen counter instead. It was then that I vowed to never have a kitchen table again.
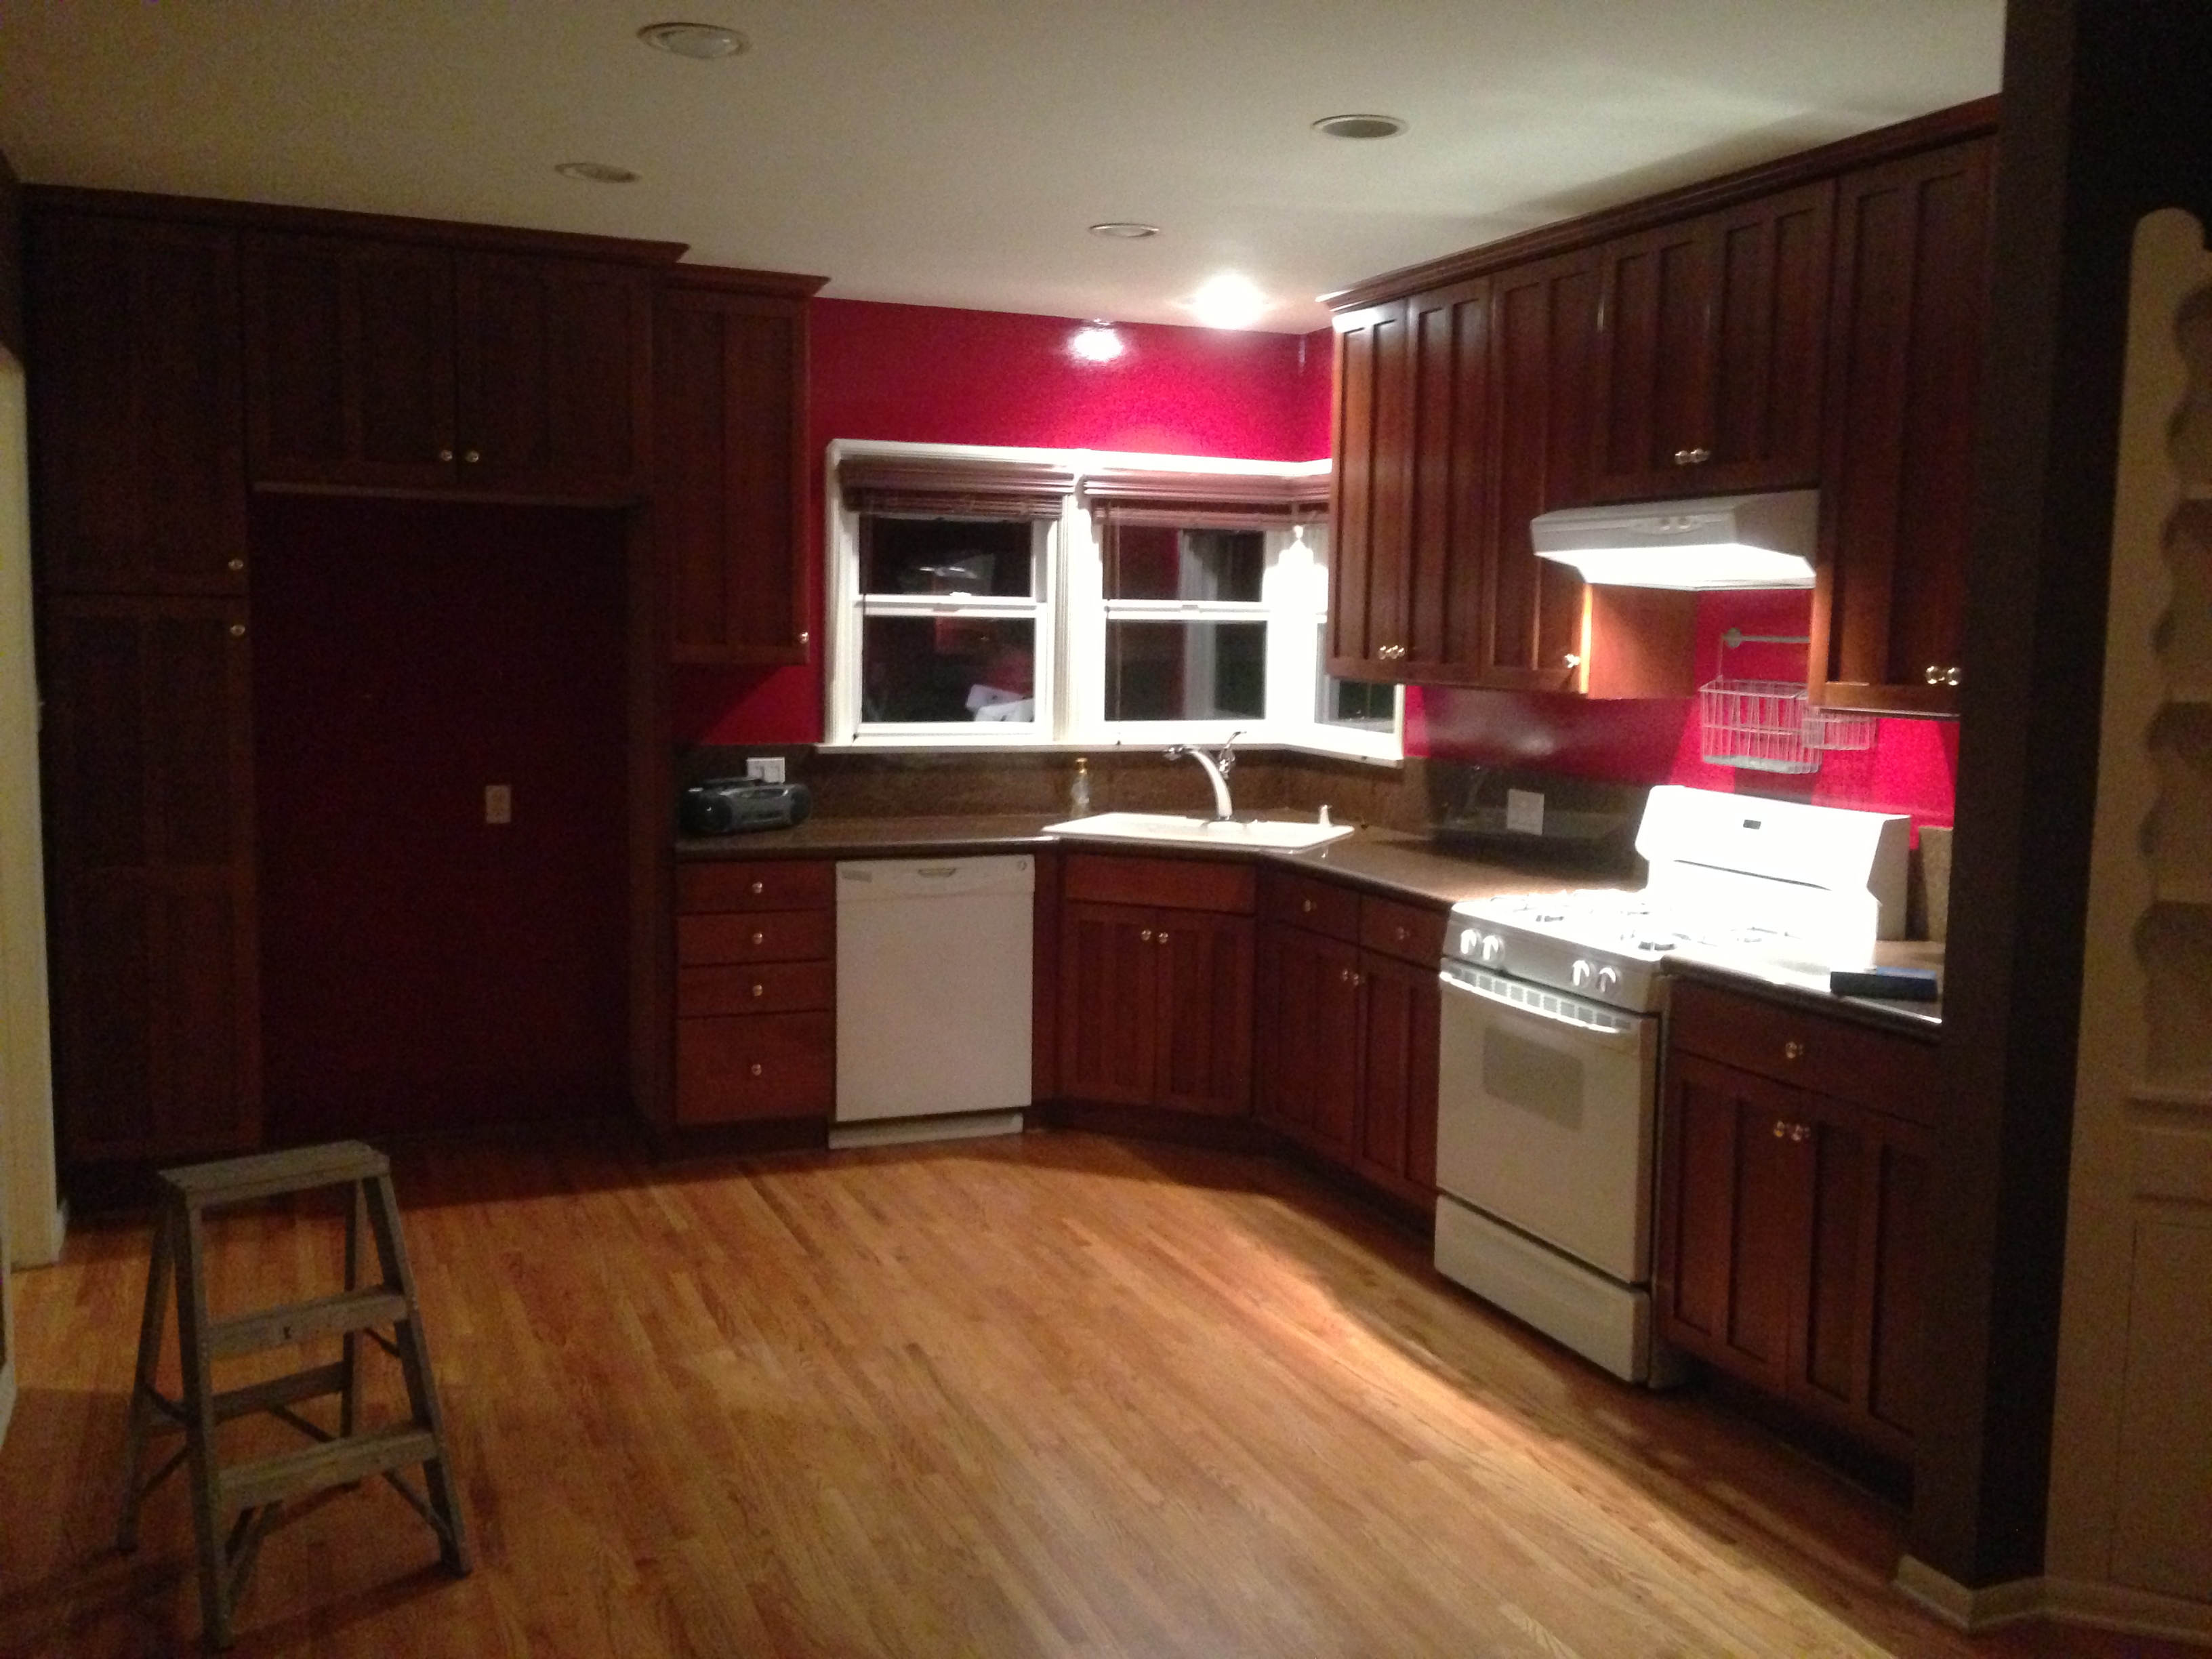
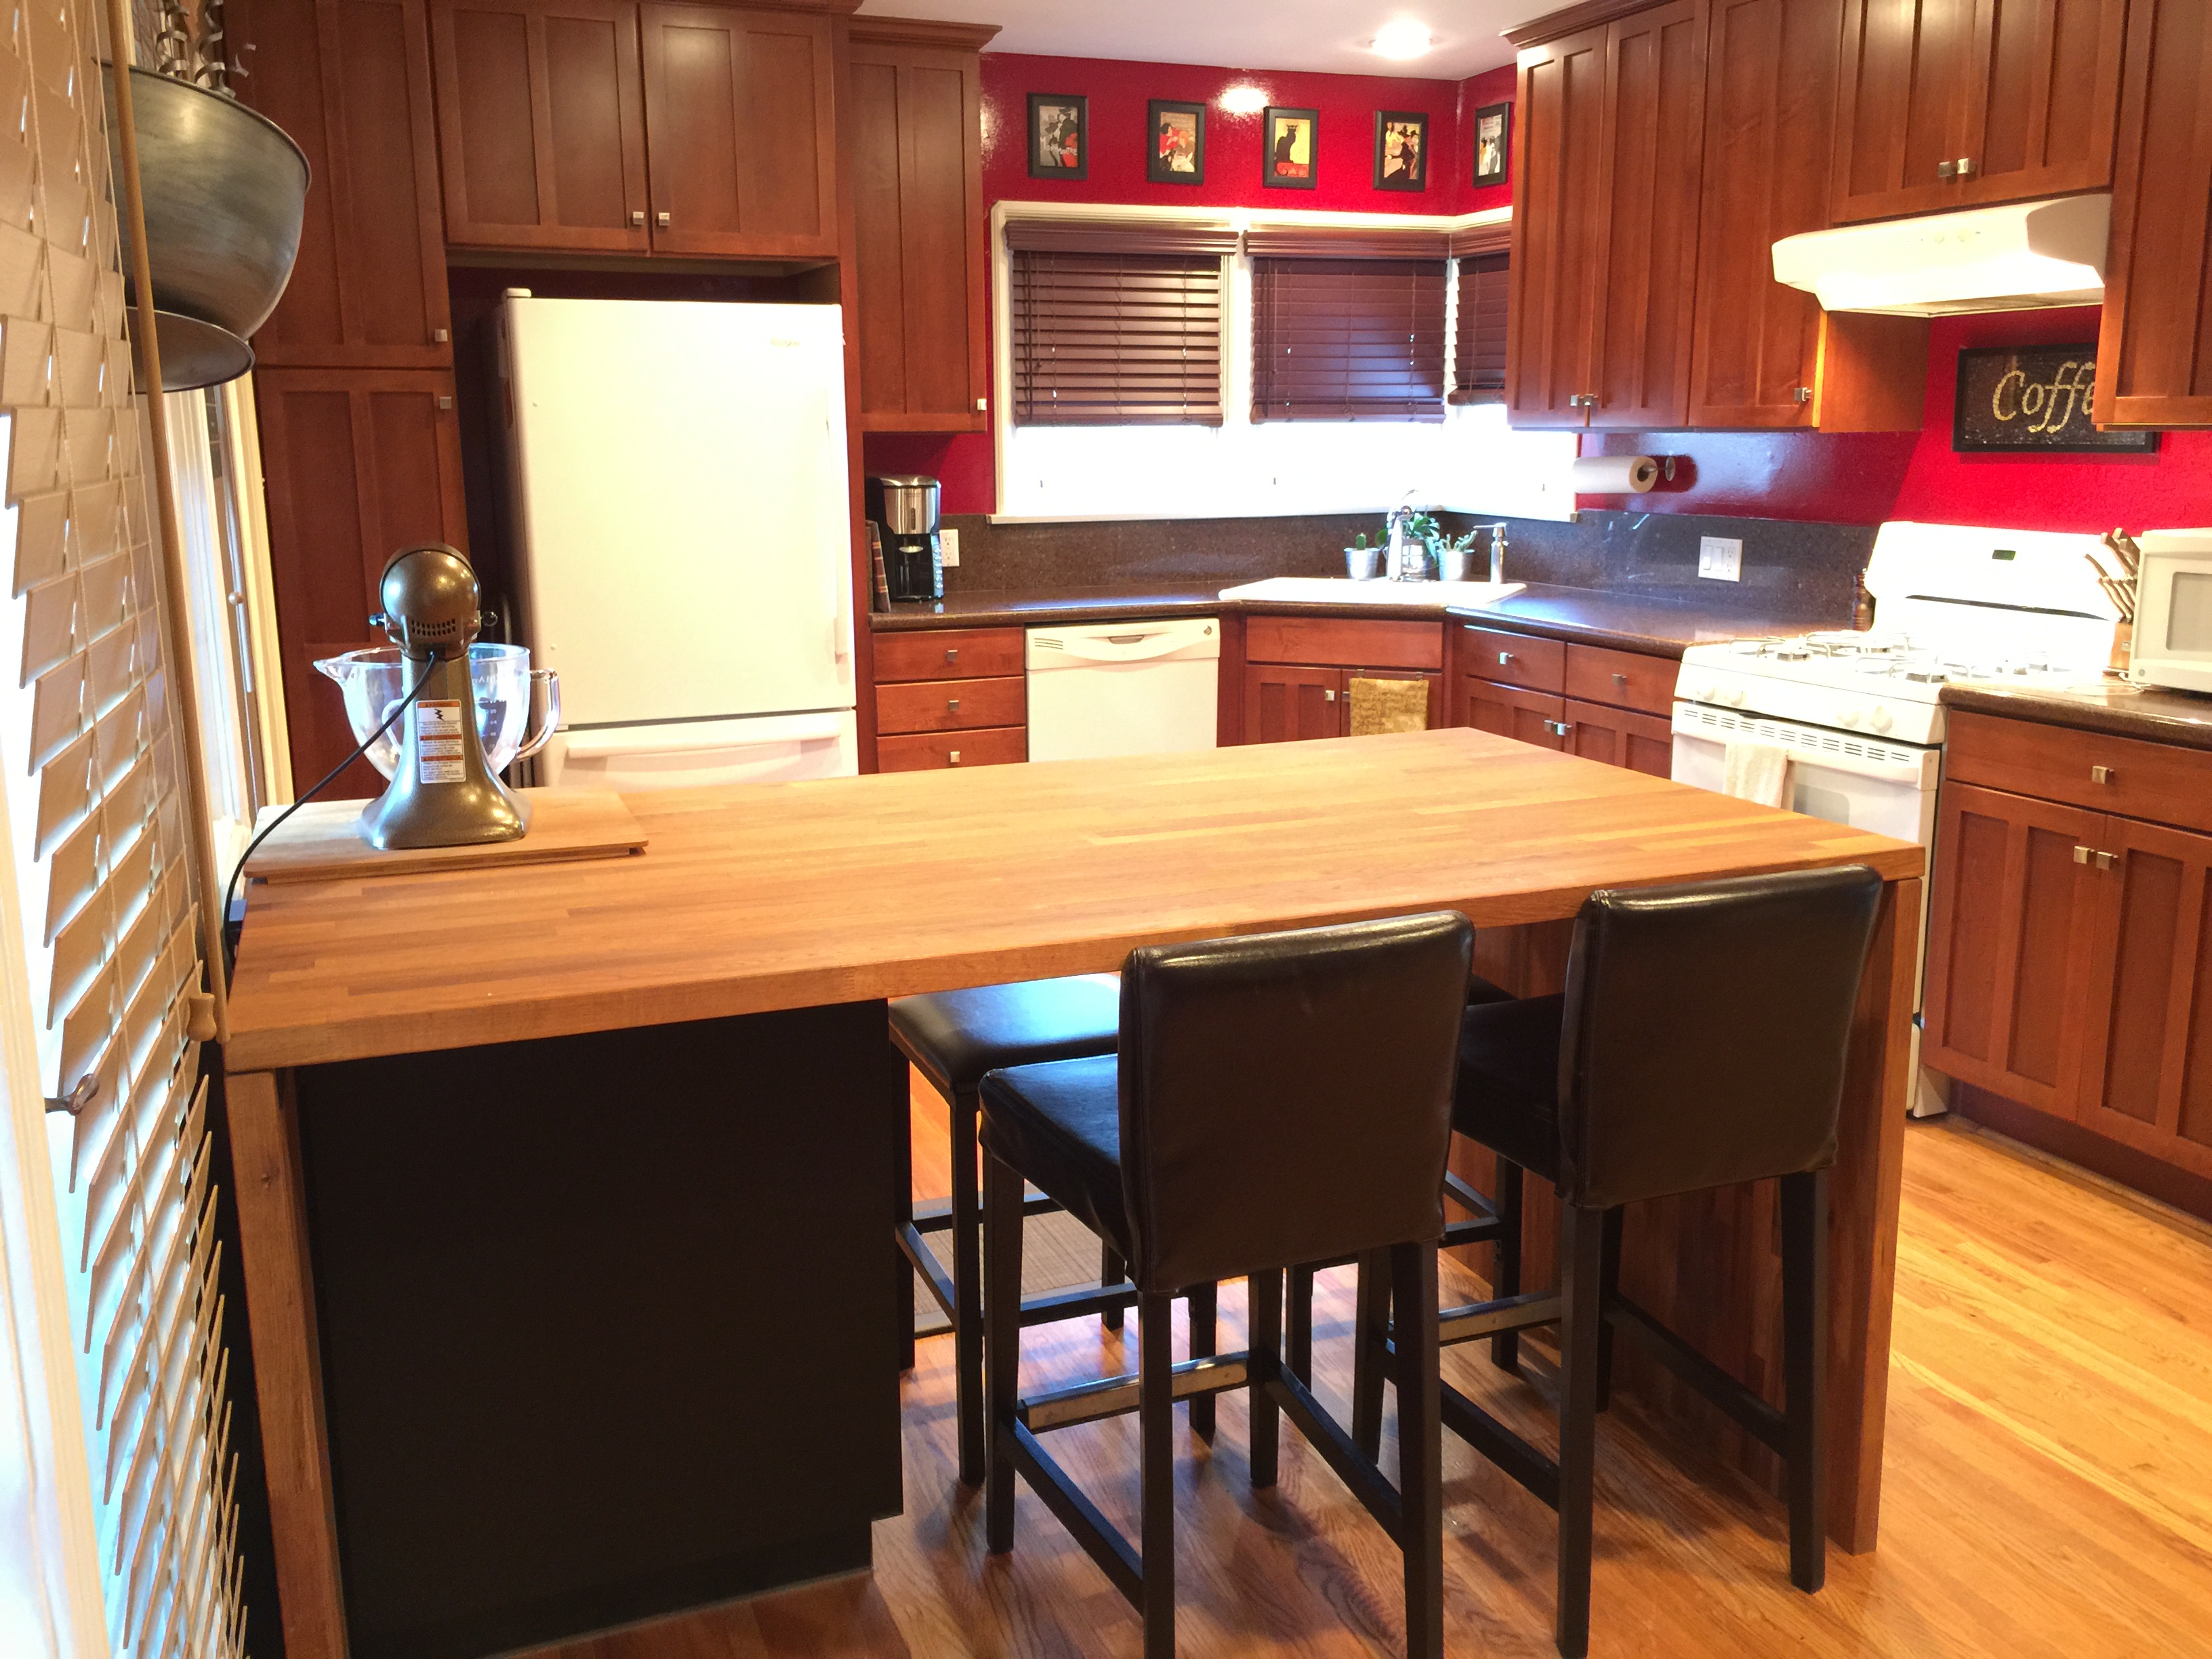
When I moved into the new house with a giant open kitchen, I knew it needed something, but it wasn’t going to be a table. There was so much open space – it needed an island. But not just any island, an island that could pull triple duty.
It needed to be a prep space, a table and storage. I culled through the internet and catalogs trying to find something big enough to fill the space and cheap enough that I wouldn’t regret it if I had to sell it to move in a couple of years.
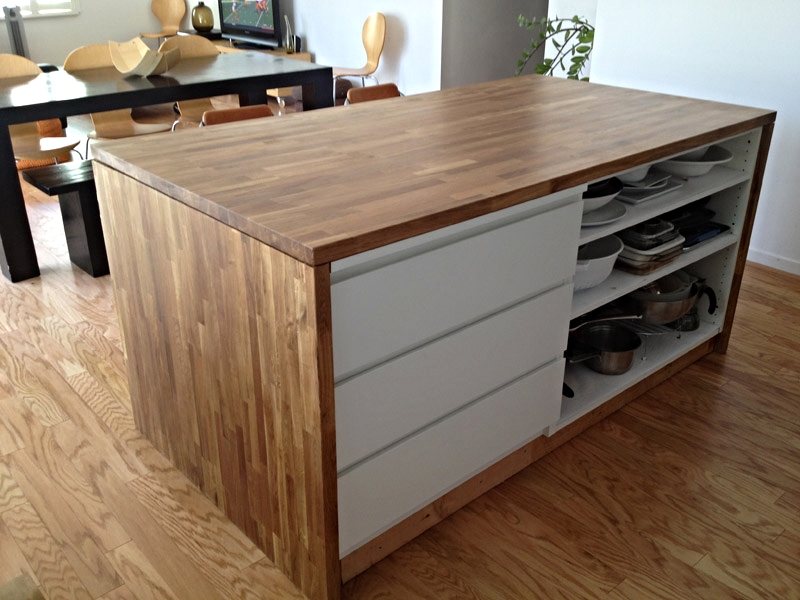
Most of what I found was too small or didn’t provide enough storage. It was when I was at Crate and Barrel that I found it. It wasn’t something for sale, but rather their counter in the showroom for placing orders. It was a table with seating on both sides and a cabinet. I thought – that’s it! I need something that people can sit on both sides, and just put a cabinet under part of it.
With a new direction, I scoured the internet again for ideas. I found one Ikea Hack where they used a dresser as cabinets and then used Ikea countertops to wrap it to create an island. And my idea was born.
Here is the island inspiration:
I went to Ikea to purchase all of the items and ended up having them delivered to the house with home delivery.
What I purchased:
(2) KARLBY Butcher Block Countertops – $139.00/each x 2 = $278.00
(1) Kitchen cabinet, with shelves, cabinet doors, drawer, kickplate and (2) finish panels
(1) Can wood oil
Total cost: $600.00
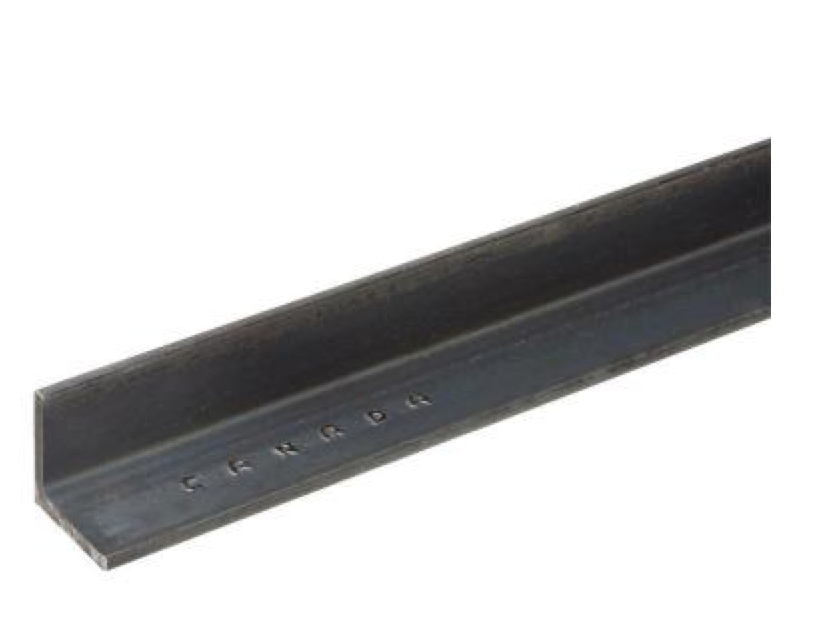
The one thing I had to purchase elsewhere were the steel angle iron. This is what I used to attach the pieces together. I purchased 2 from Home Depot and my friend drilled holes in them at his work. I spray-painted them brown so that they would blend in better with the wood and be less noticeable.
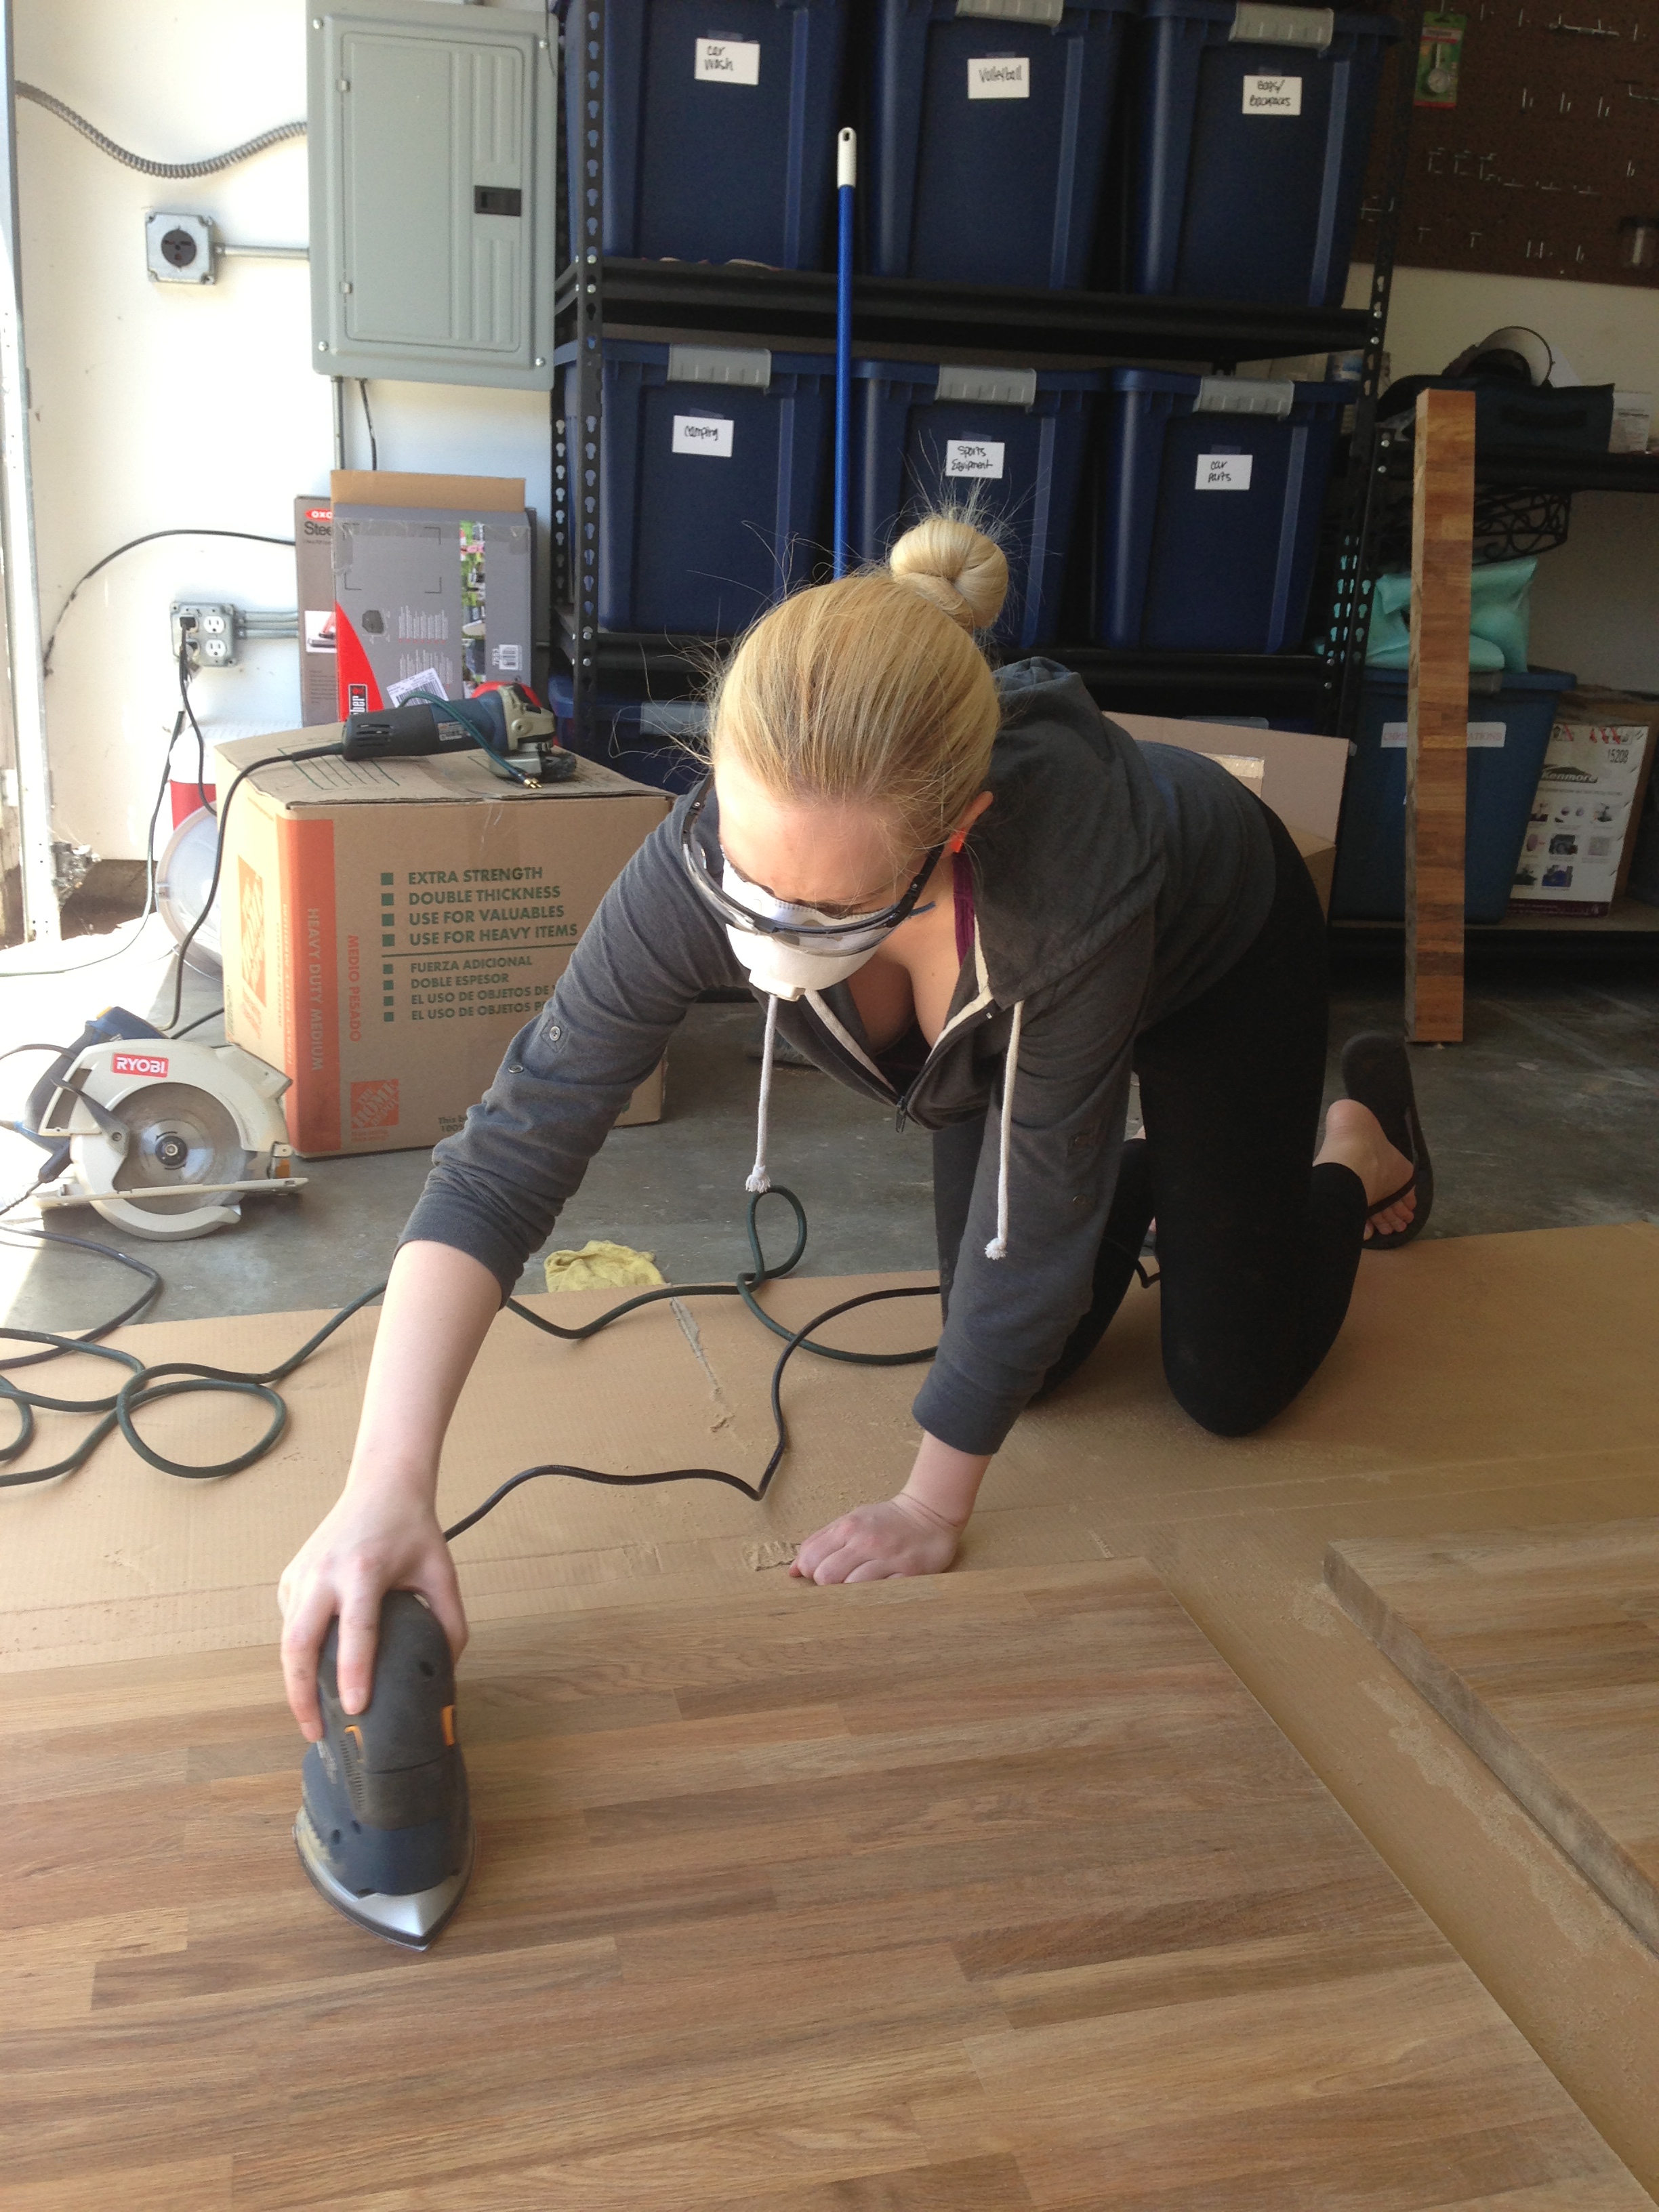
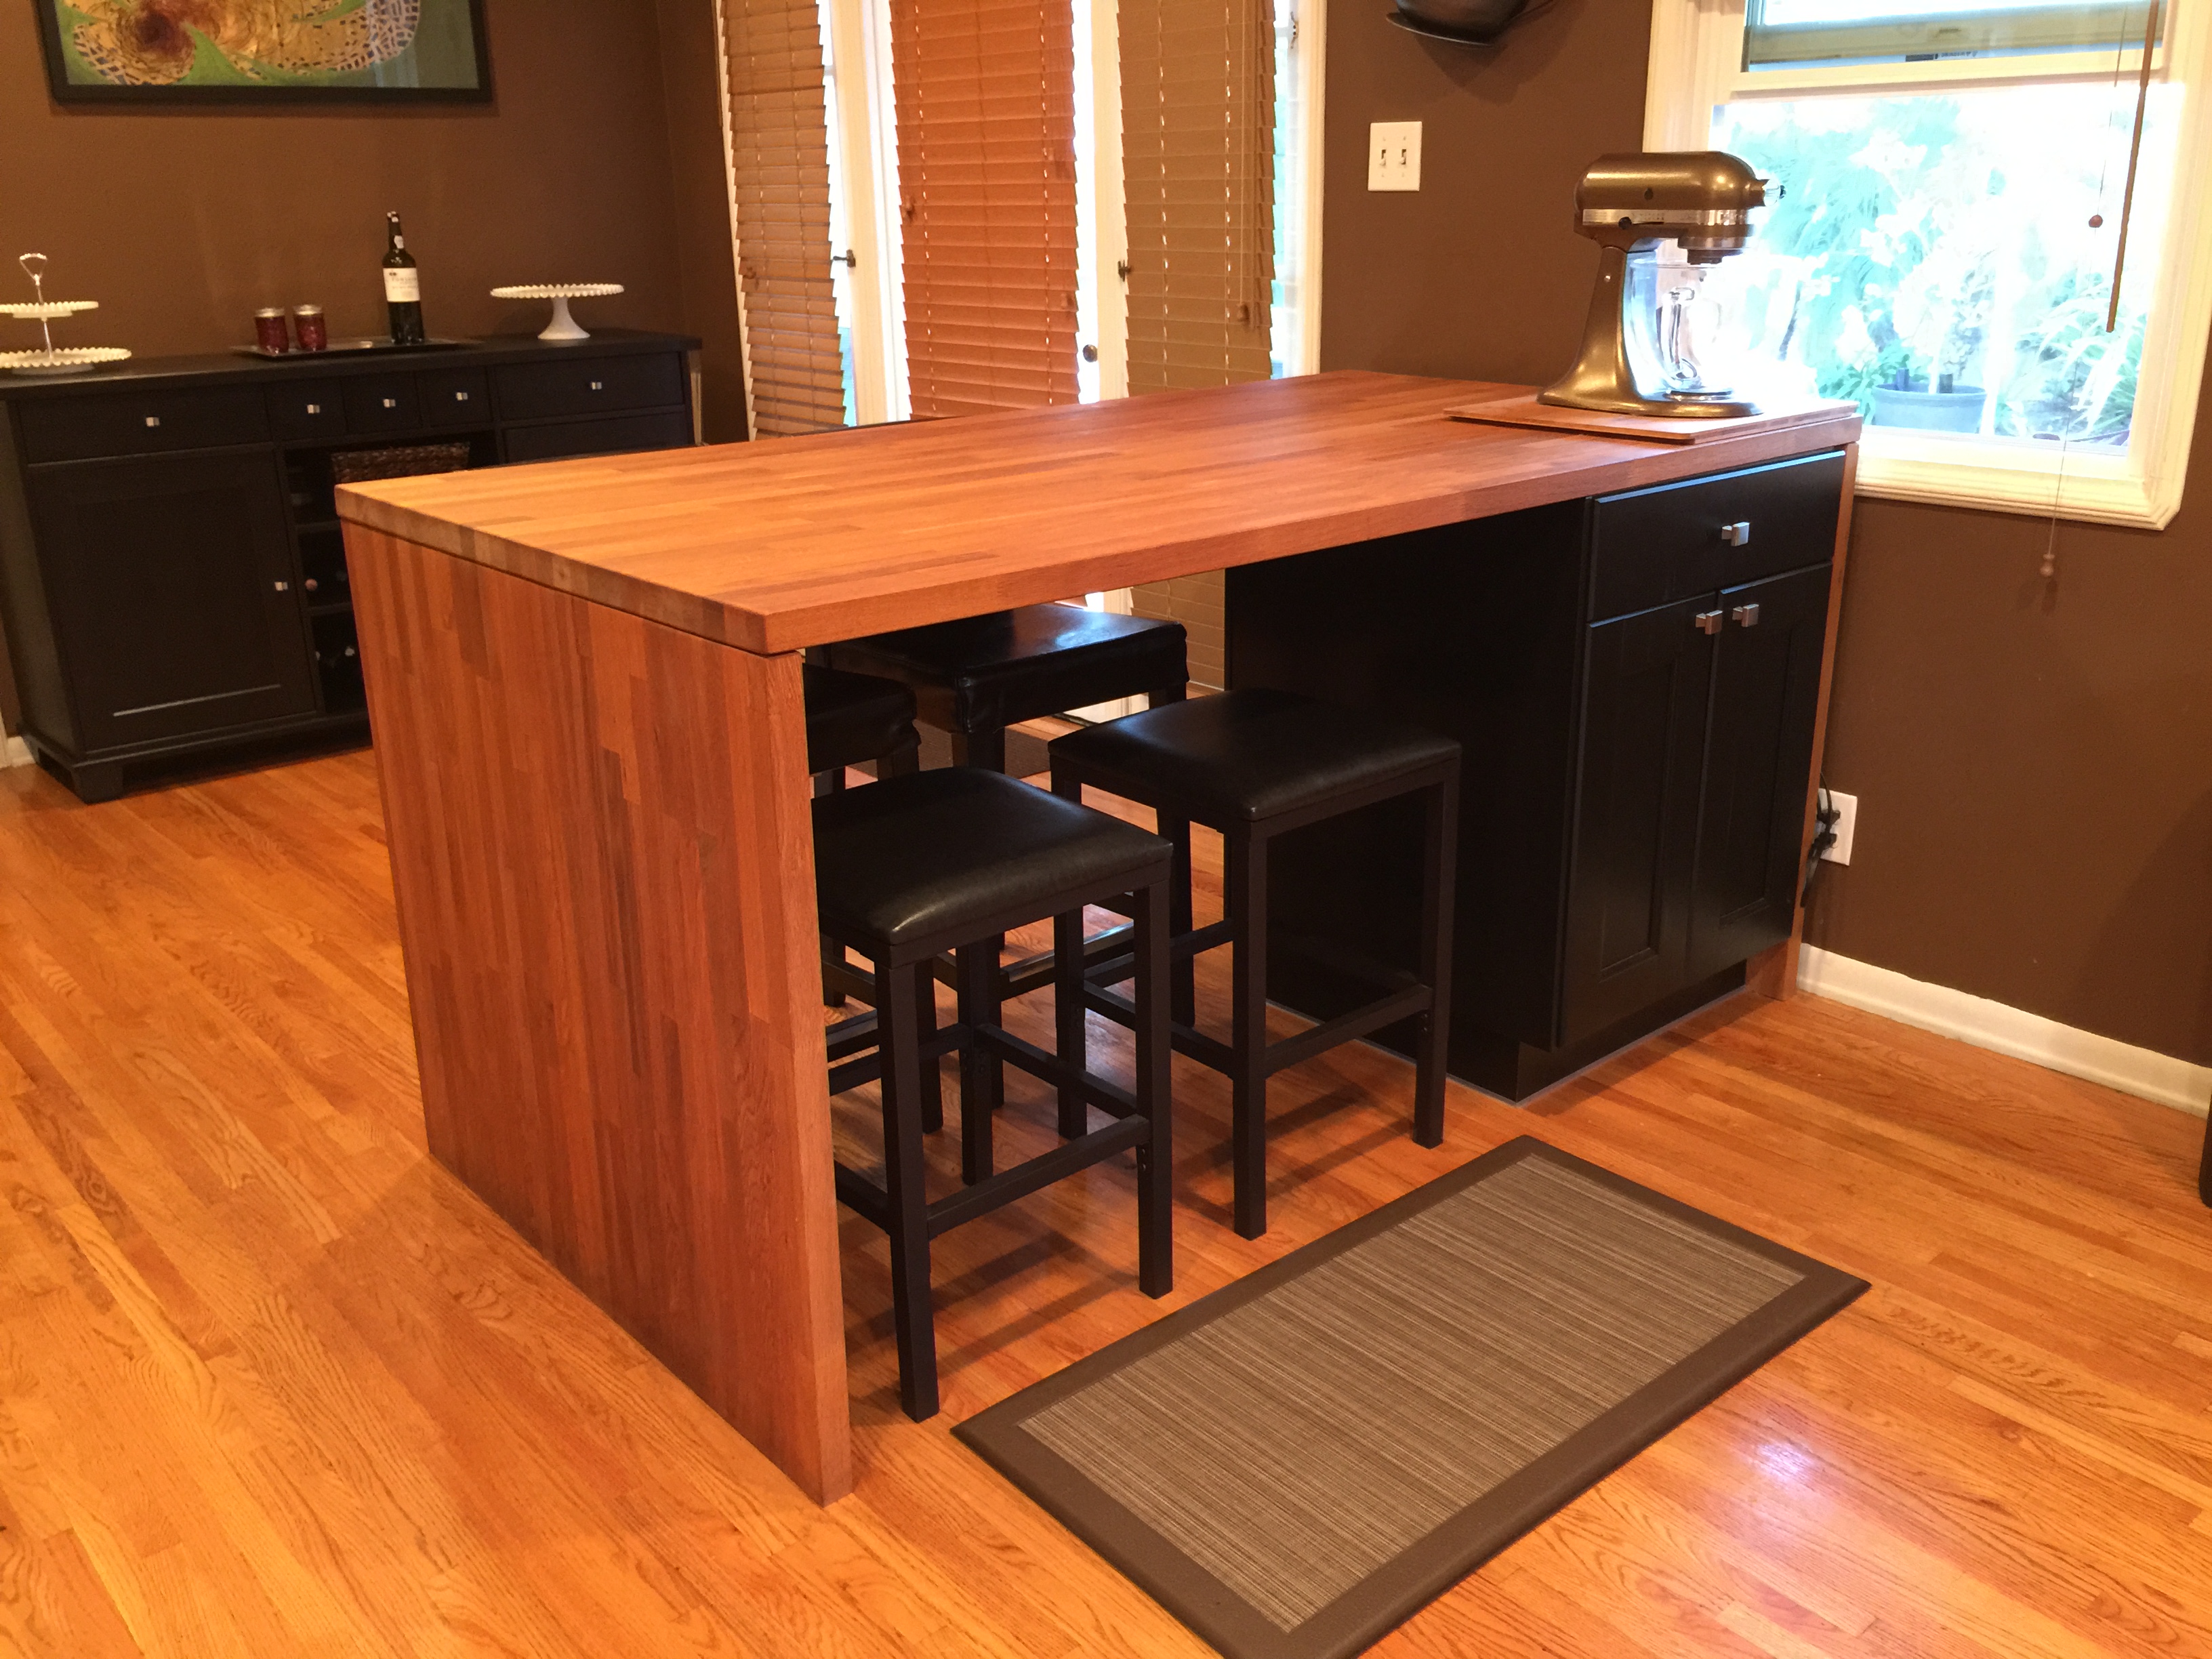
Before building the table, I sanded each of the pieces of butcher block outside with a power sander. Really, I should have sanded, oiled, sanded, oiled, sanded, oiled…but the sanding took forever, so we only did it once. Oops. It ended up being ok though – the surface was a bit rough, but over time with use it has smoothed out.
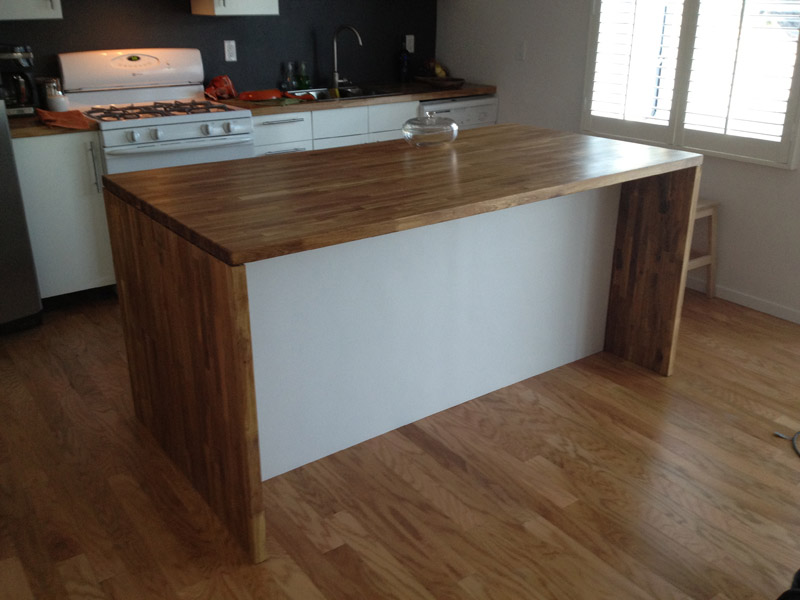
To build the table I simply cut one of the butcher-block countertops in half with a circular saw for the legs/sides. It worked out that the finished height was exactly counter height. Before assembling I moved the pieces inside. It turns out the uncut piece was incredibly heavy, so I had to call a couple of friends over to help move it inside.
Once inside, I drilled the holes for the angle brackets and attached the top and sides together. Once together, I carefully stood the table upright.
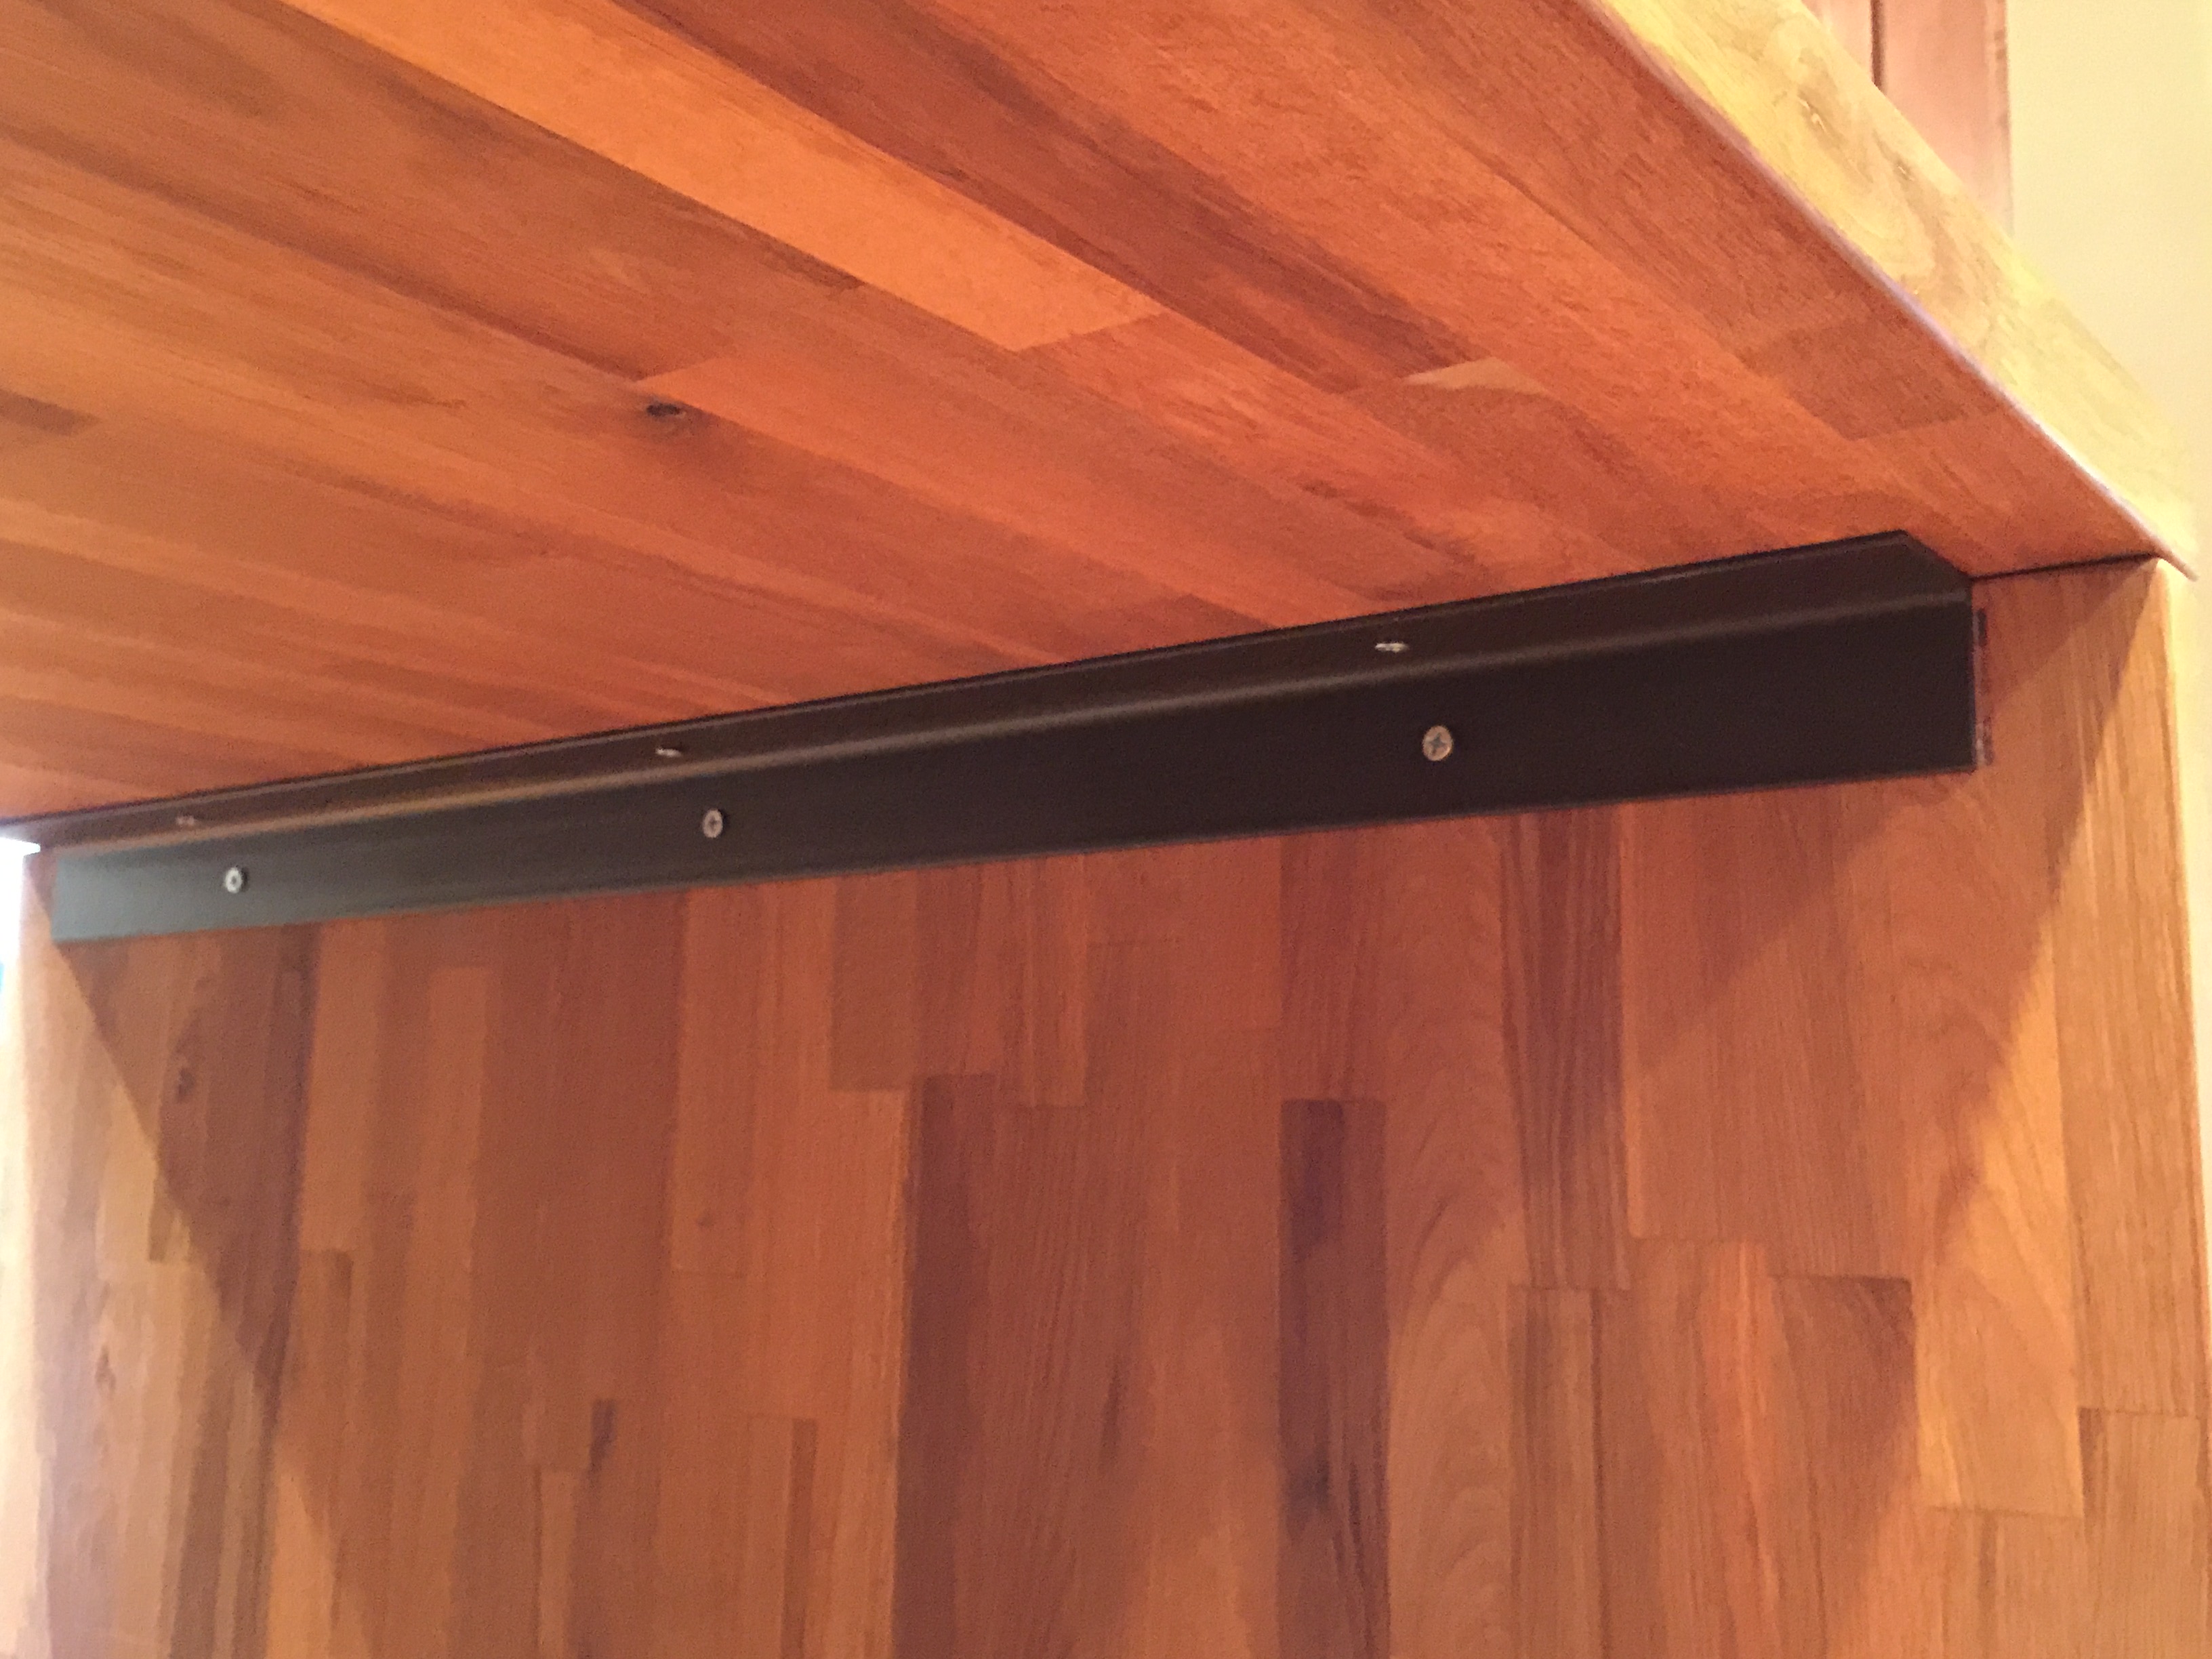
Now, the table, without anything under it for support was a little wonky. So if you do this, definitely plan for additional reinforcements for the legs, or something under the table.
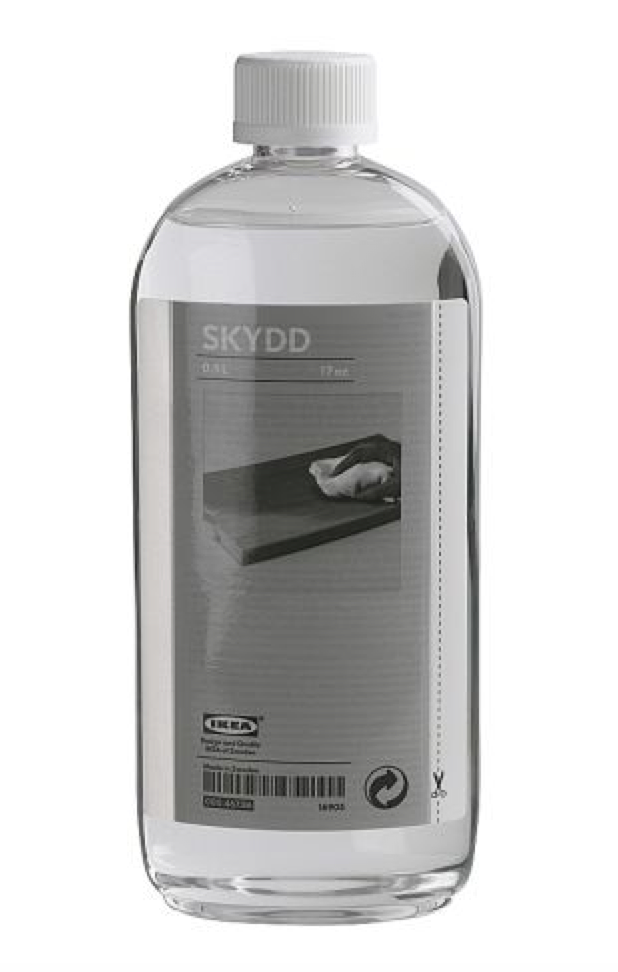
Once the table was assembled I oiled it three times using the butcher-block oil I bought at Ikea.
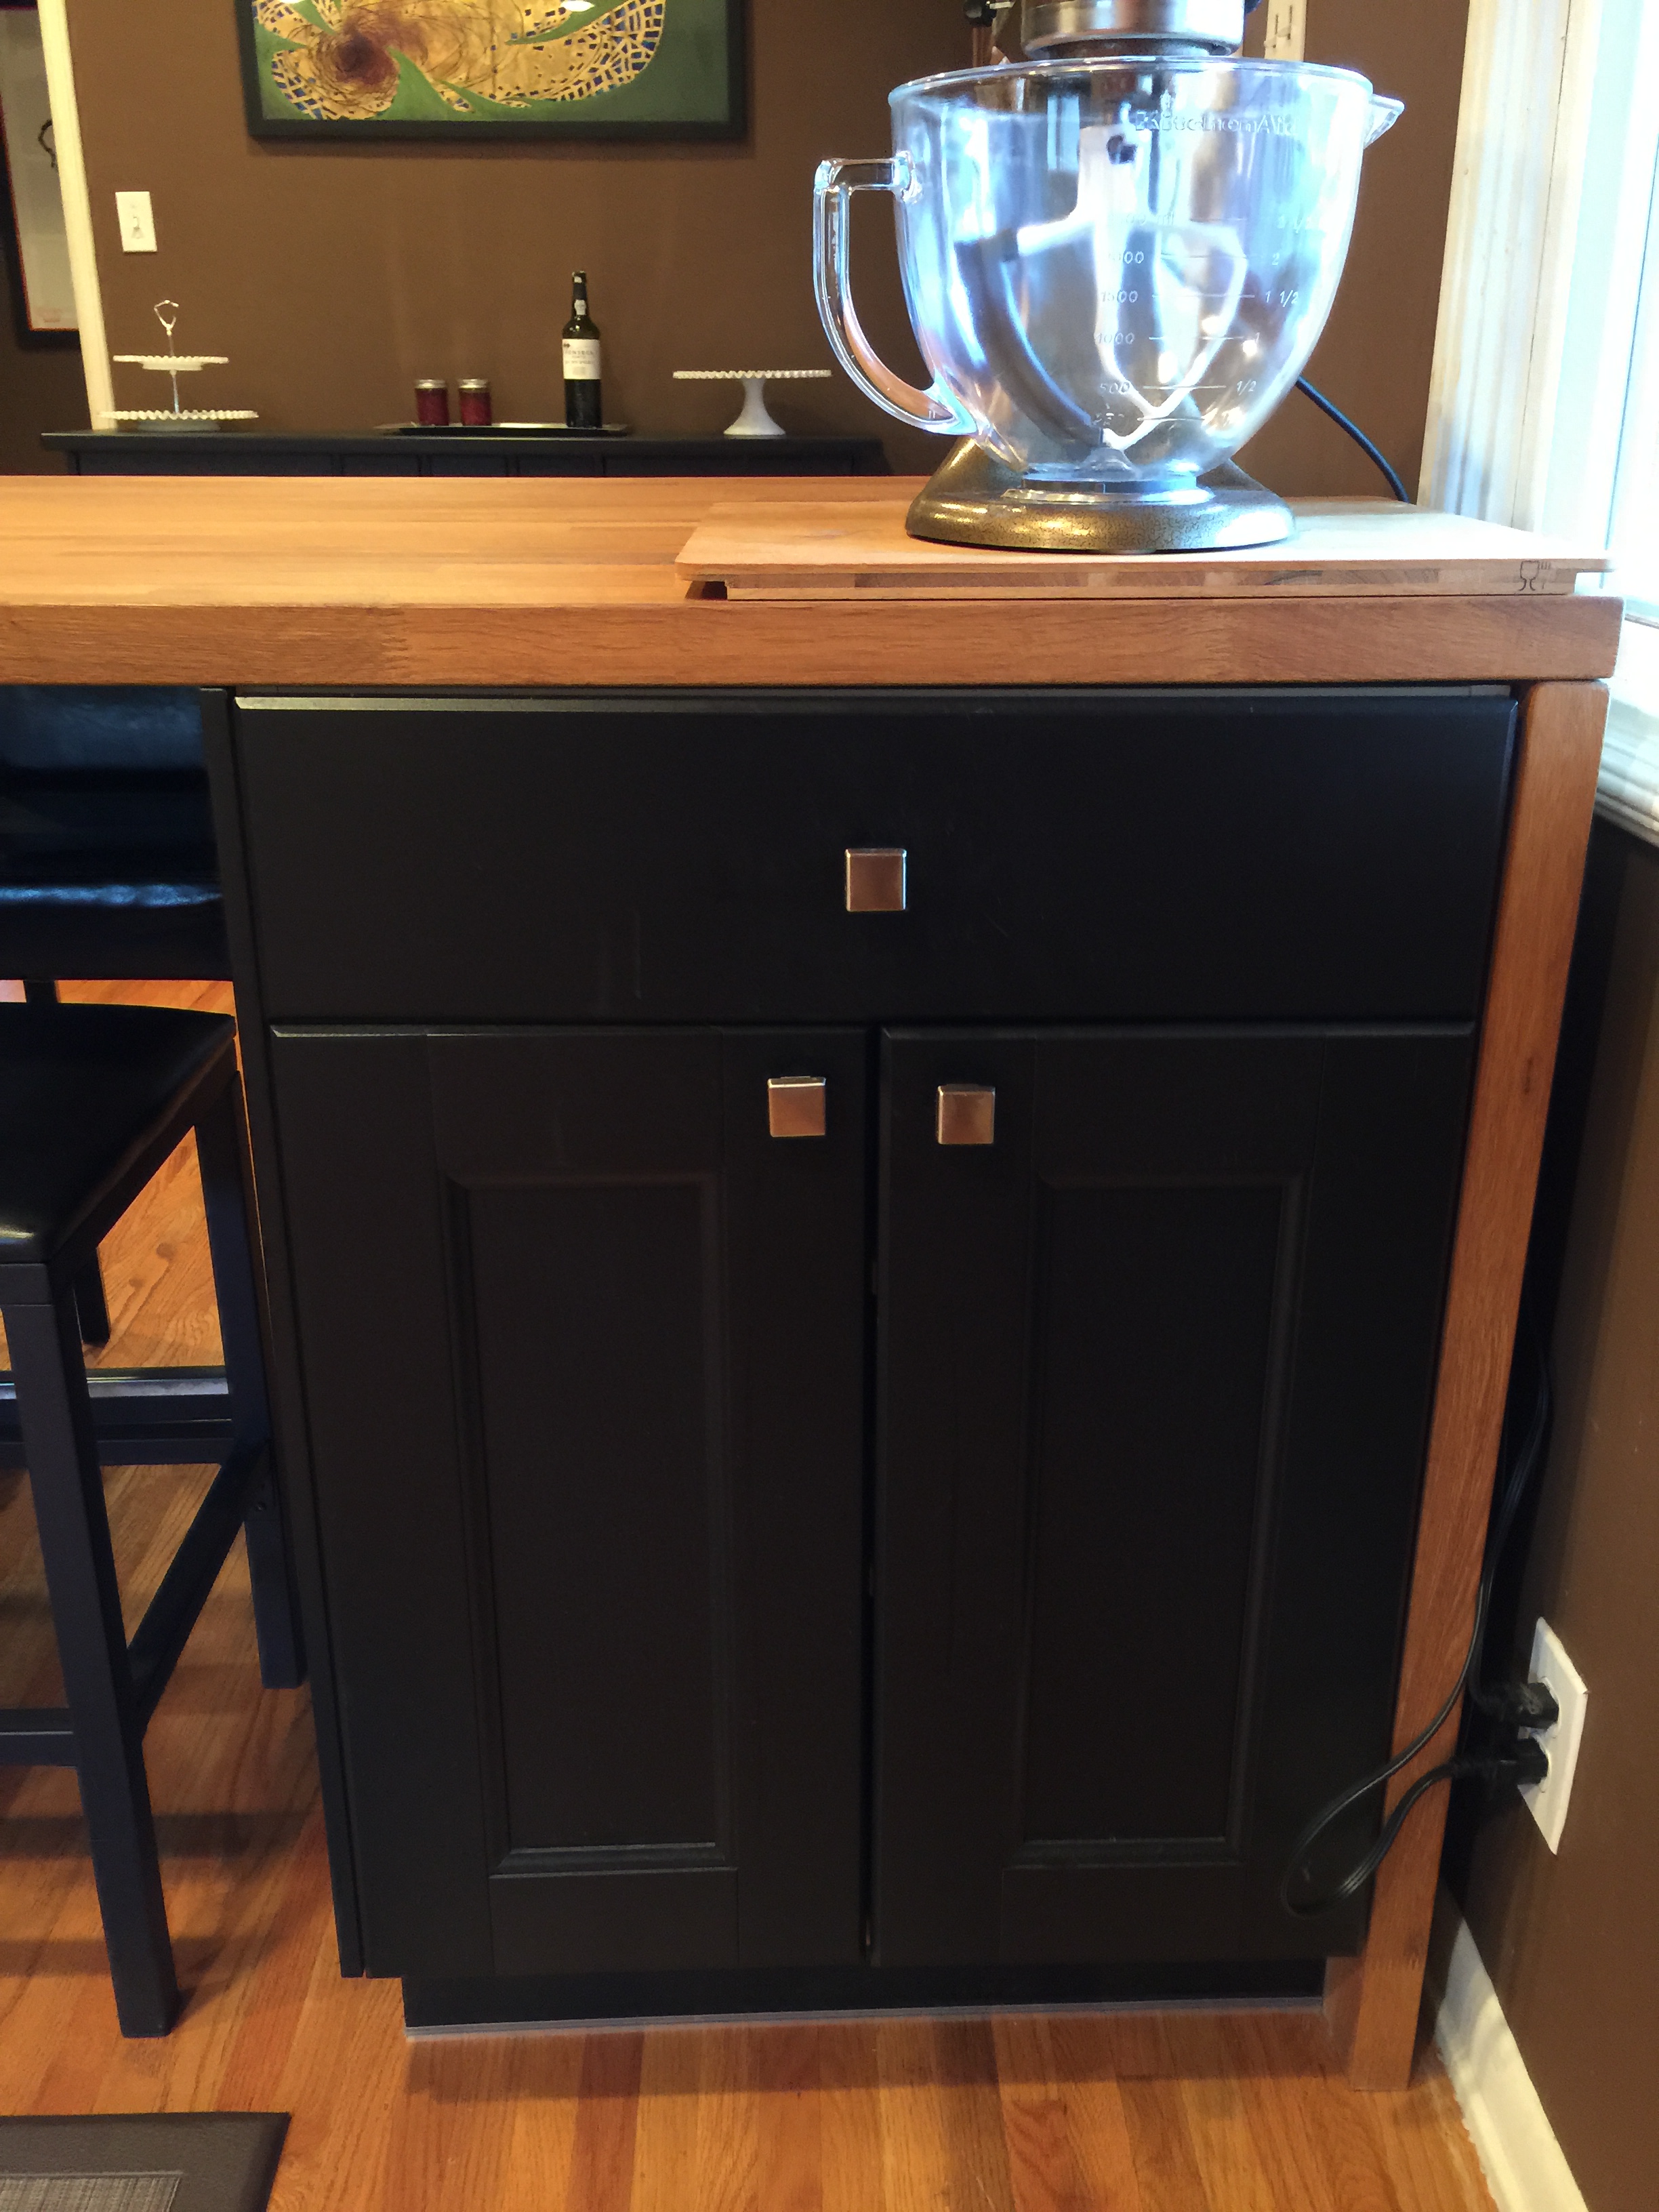
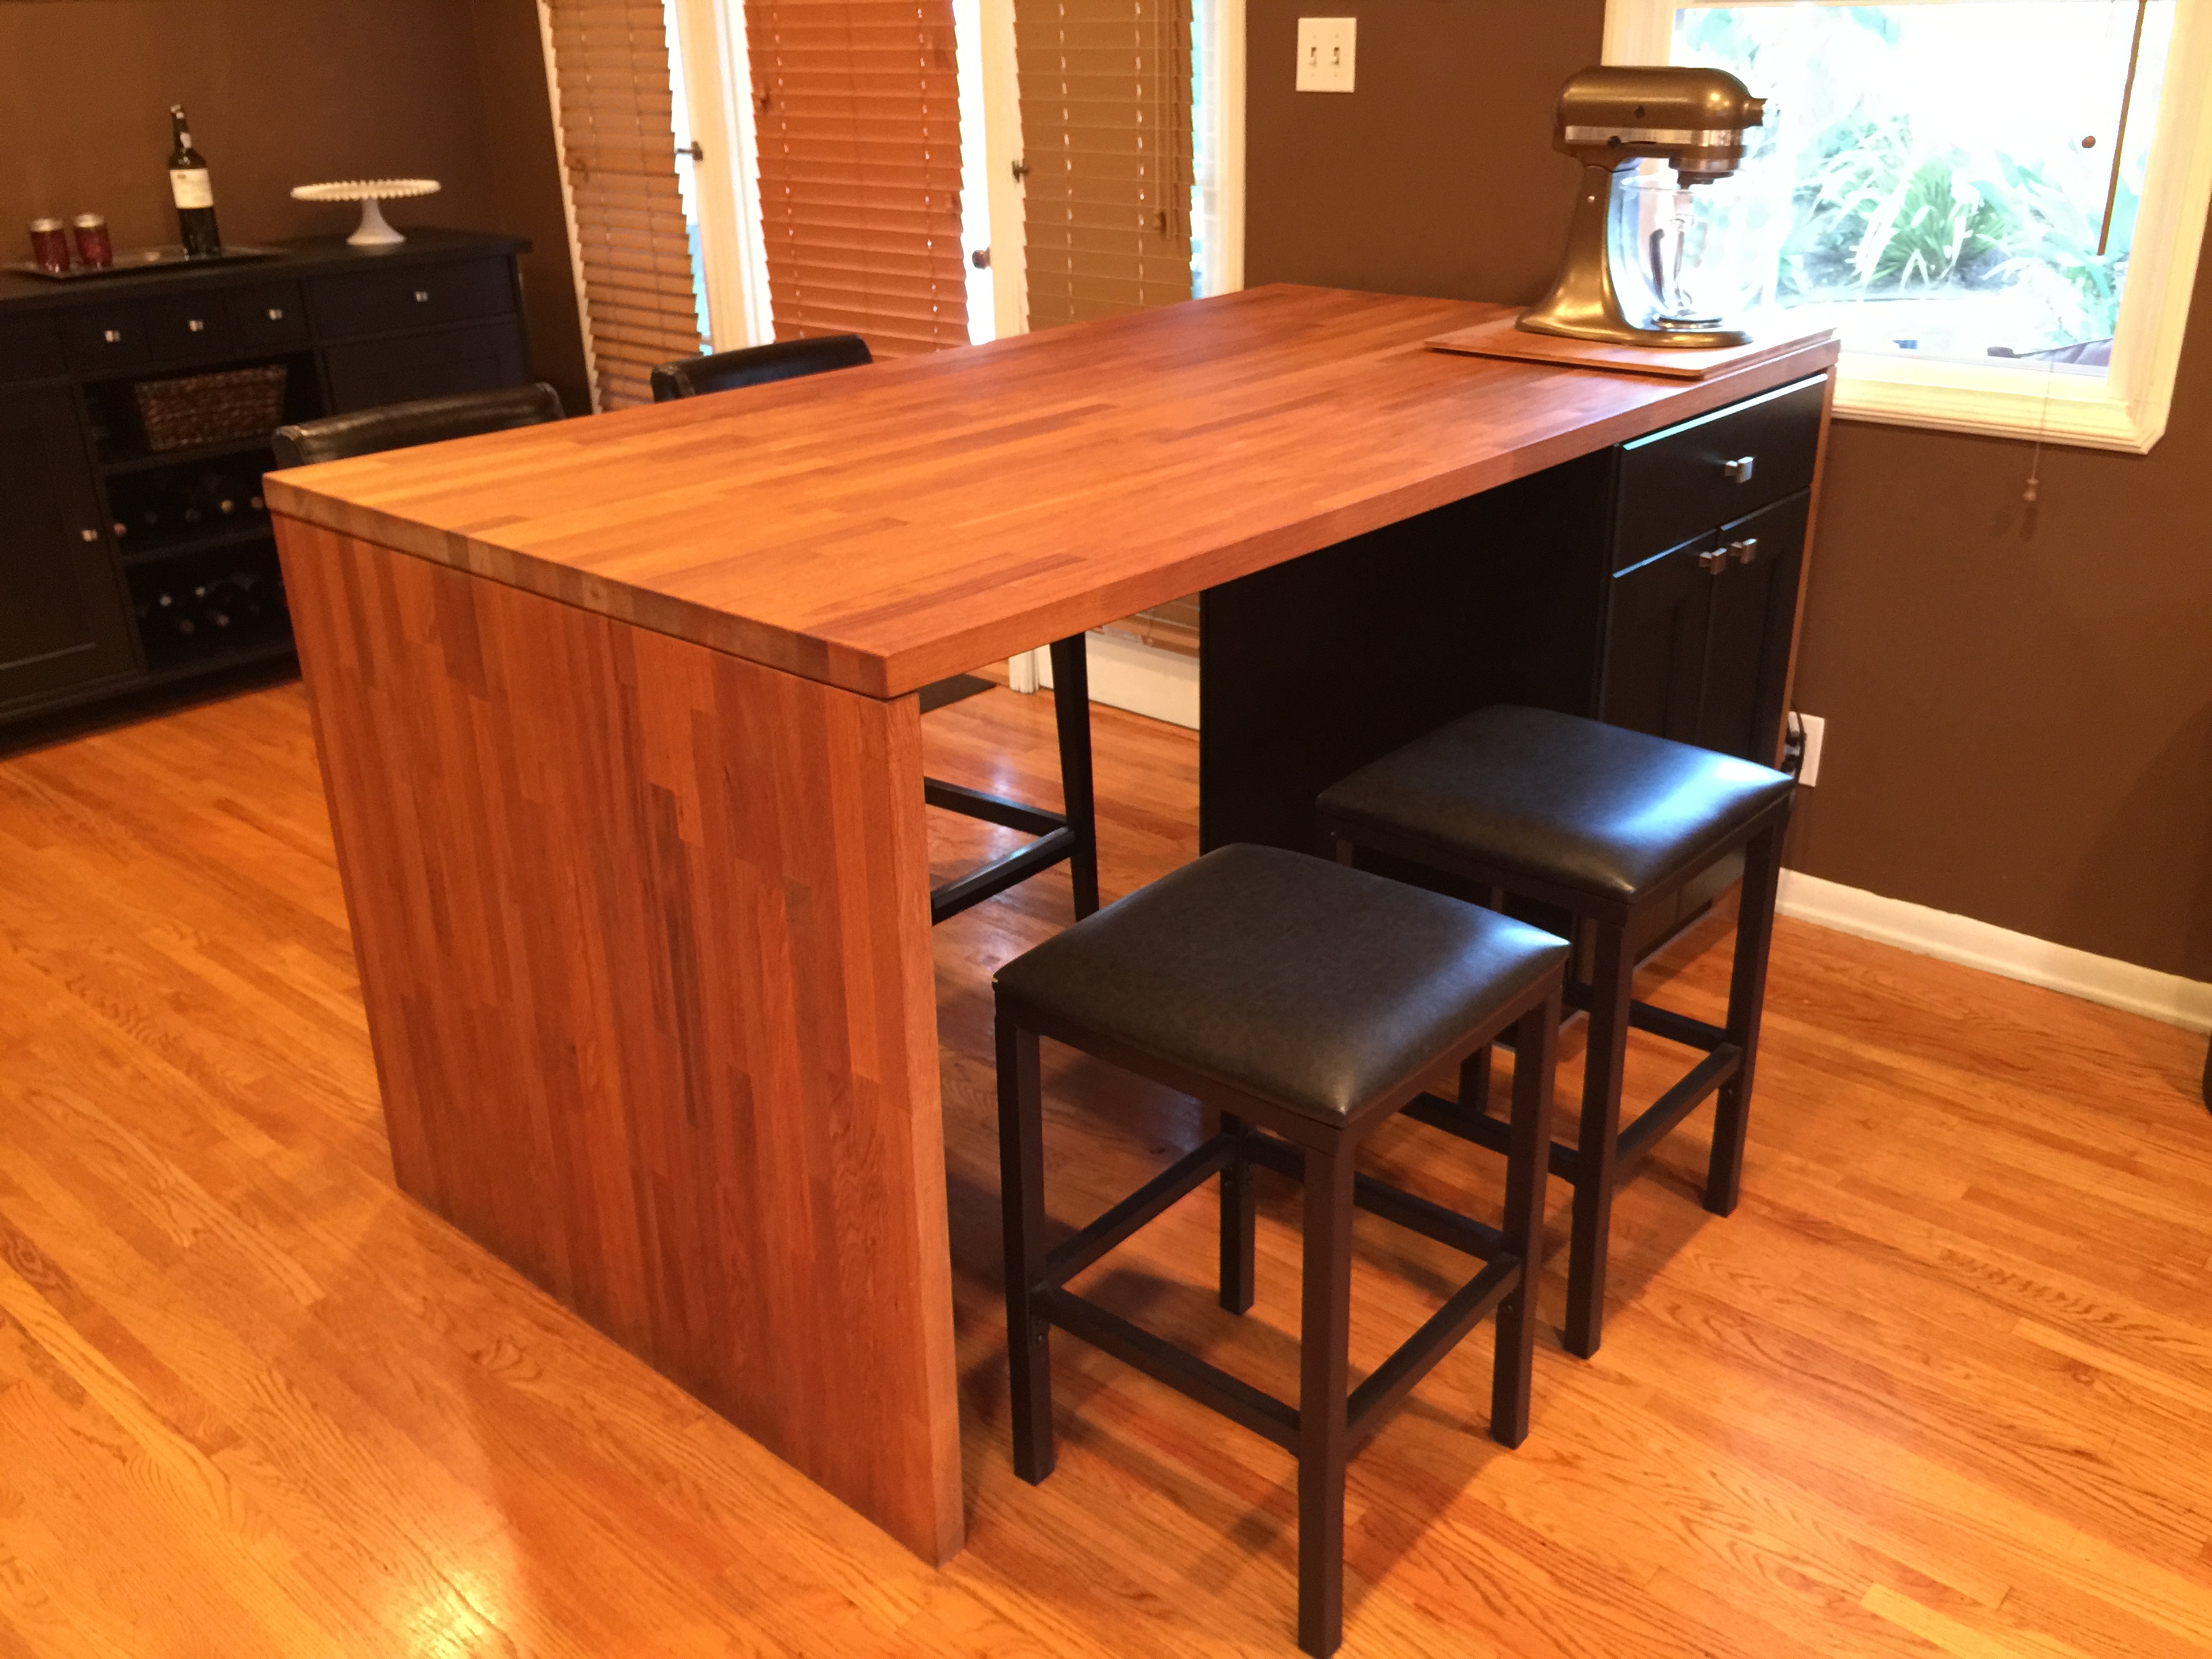
 I needed additional storage for the 1950’s kitchen, so I added one kitchen cabinet under the island. I wanted one that didn’t go all the way under the table, so that people could sit all the way across the “bar” side of the table. I built the cabinet using the pieces from Ikea, and then placed it under the table. I adjusted the feet up, and as the cabinet rose, it settled the table, squaring it up and taking out any wobbles. If I need additional storage, I can still fit another cabinet or open shelving on the backside – open to the bar side of the table.
I chose to go with Black-Brown for the cabinet color as that is the color of the rest of the furniture, even though it doesn’t match the kitchen cabinets. It is actually quite a common trend nowadays for the cabinets in the island to be a different color than the rest of the kitchen cabinets. It doesn’t bother me at all like I imagined it would.
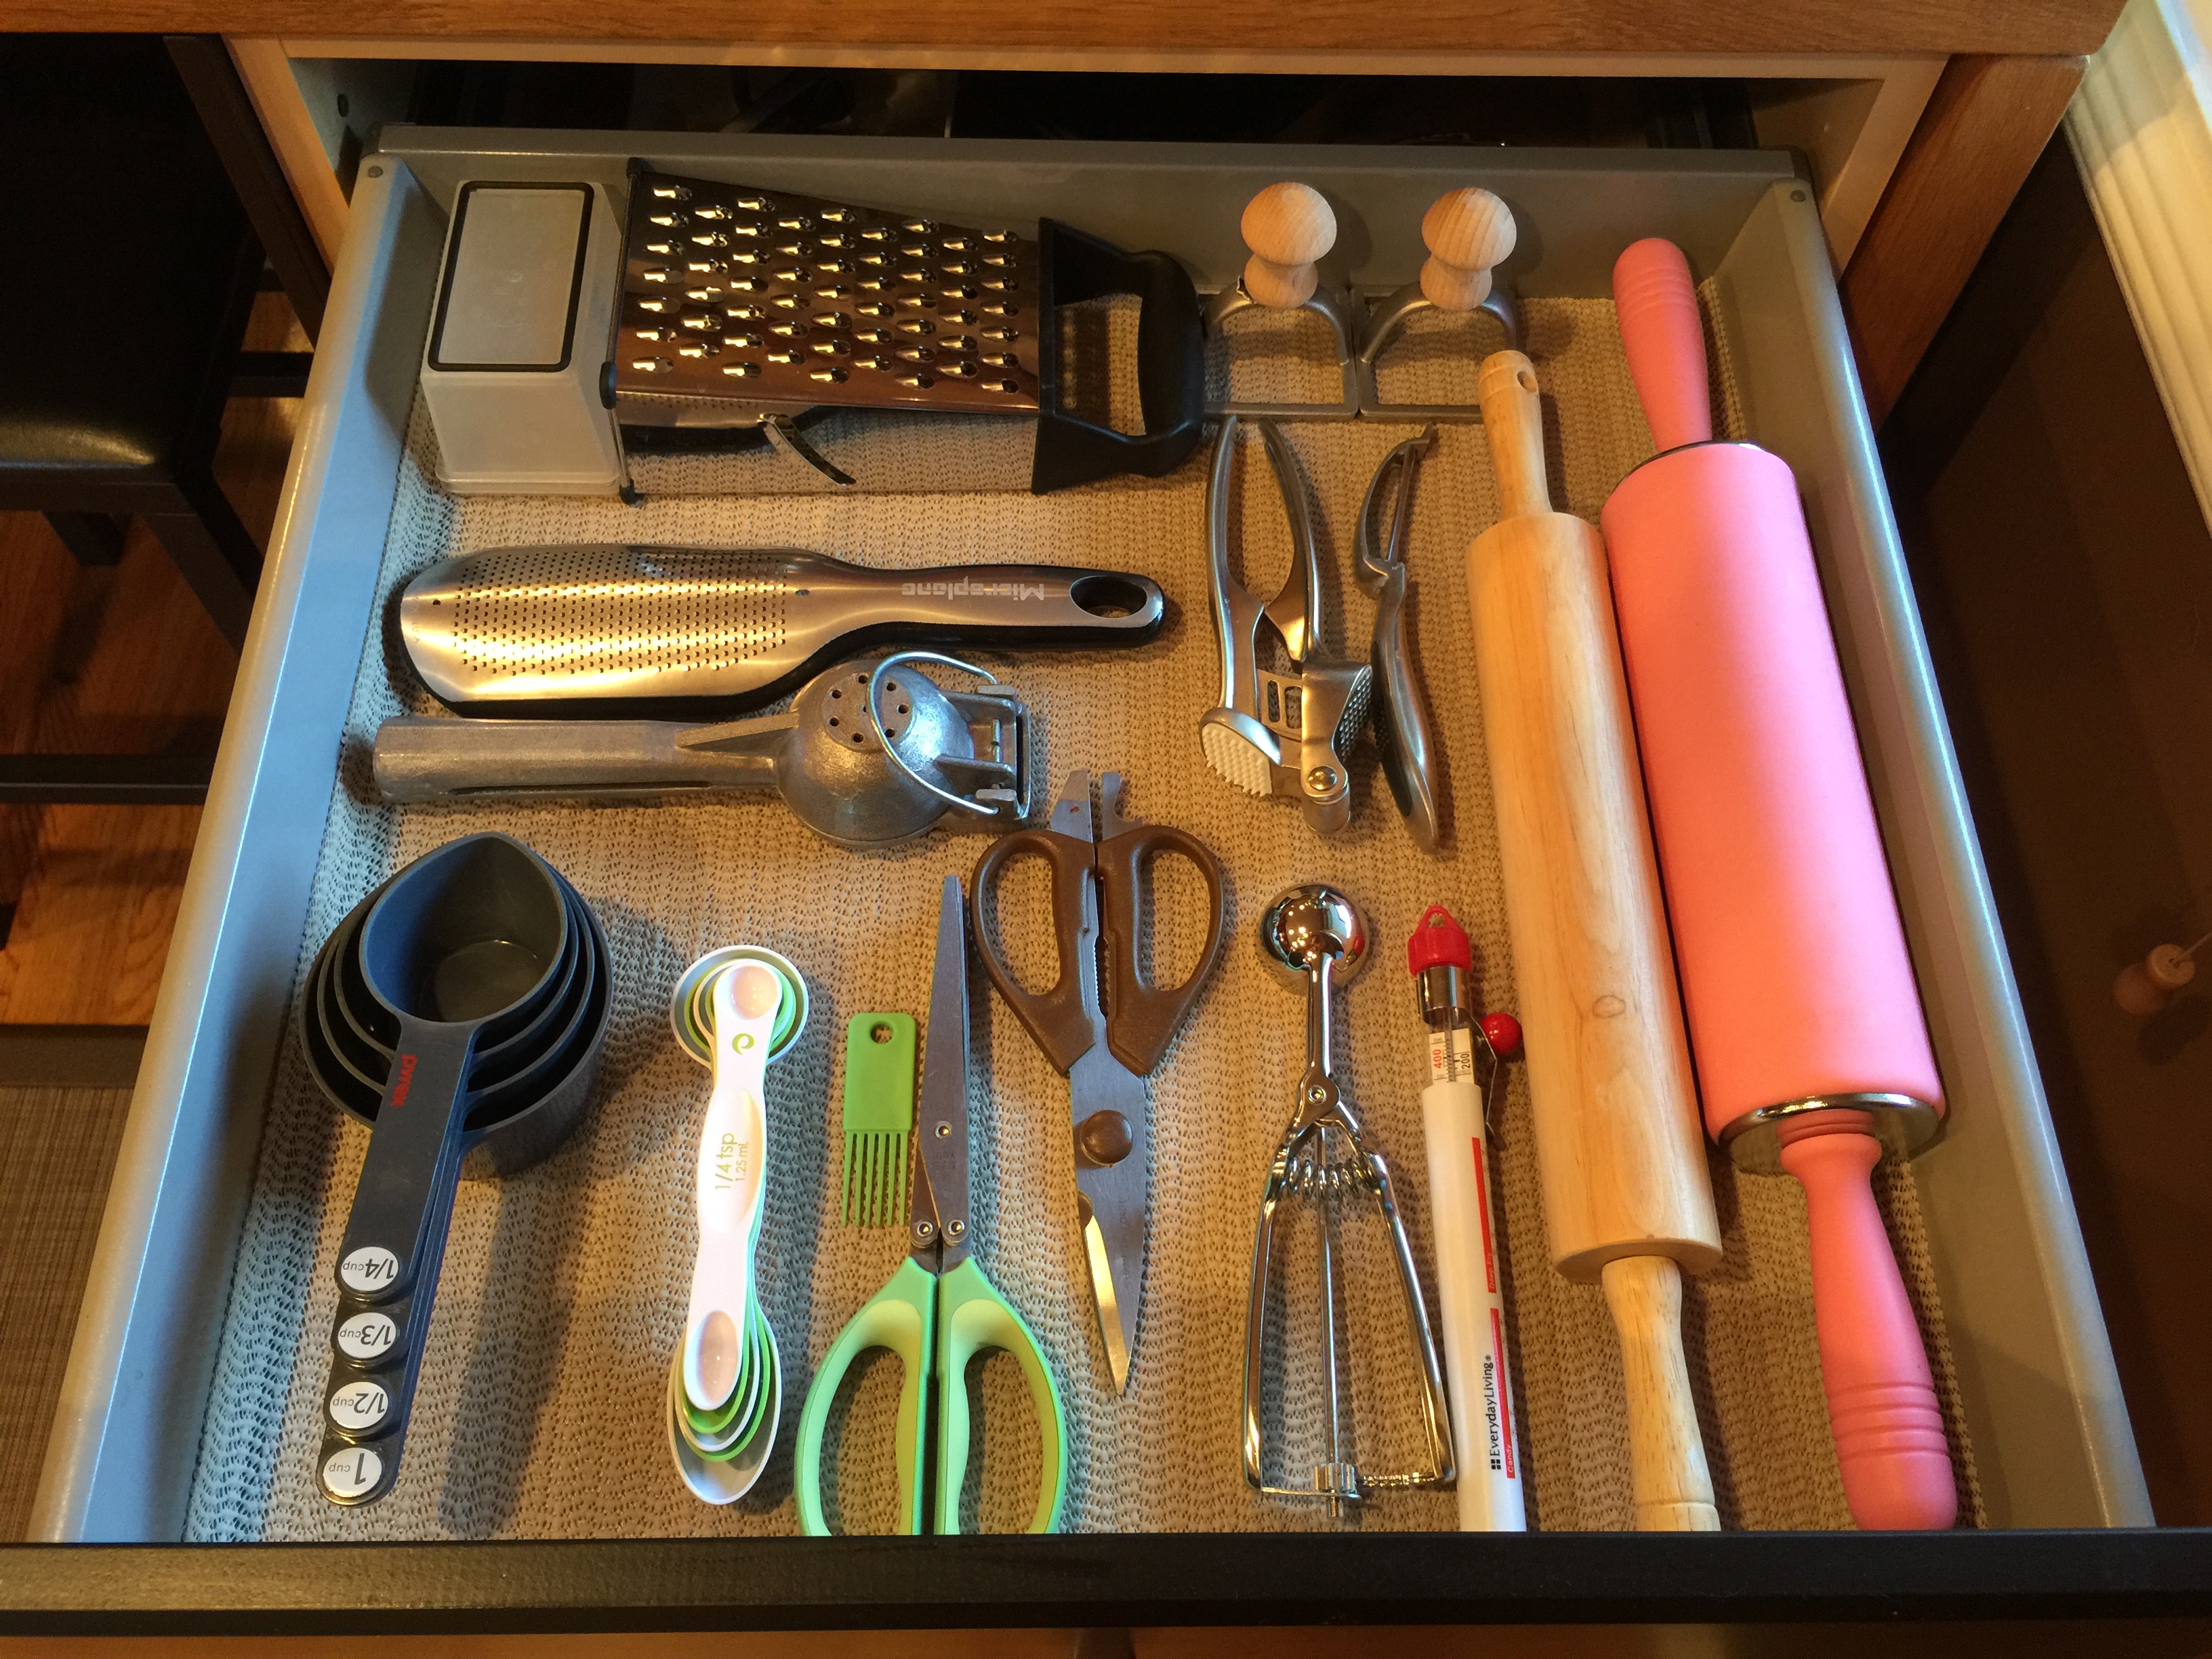
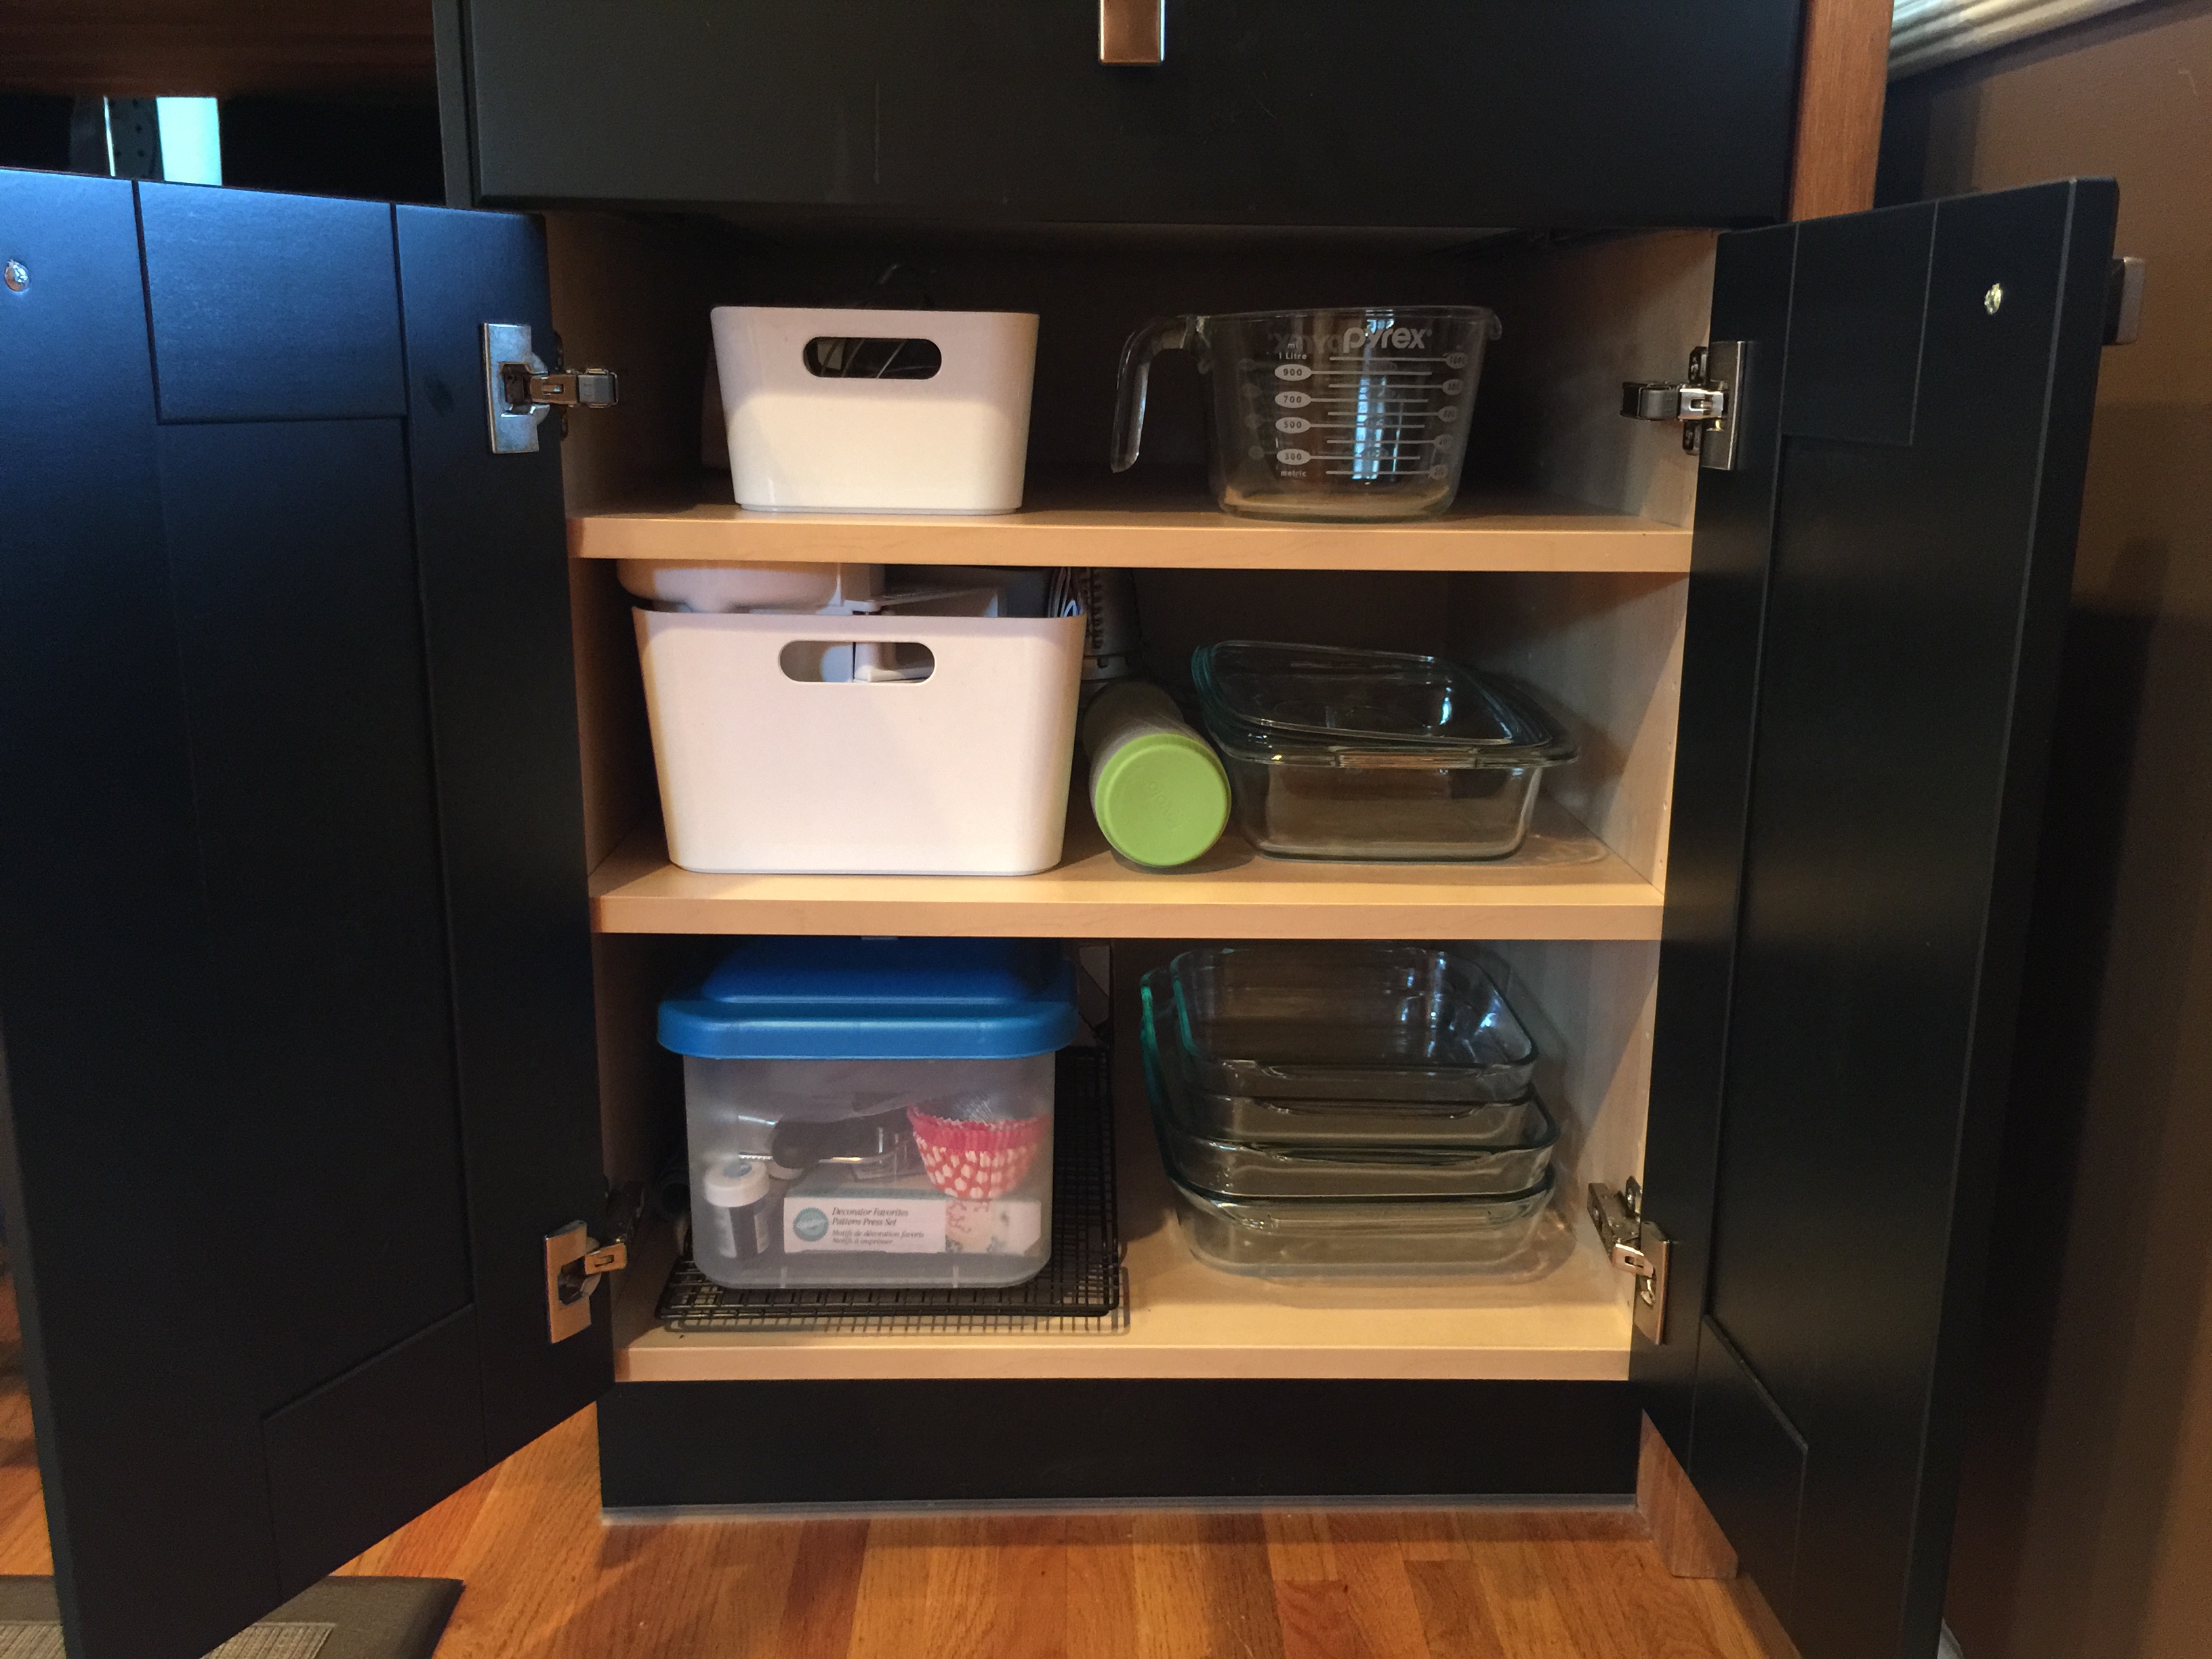
I use the cabinet in the island as a baking station, and all baking pans, measuring tools, etc are stored there for easy use. The island also holds the electric stand mixer.
On one side of the table – the bar side, I added our existing counter height barstools. The other side of the table is open as well, so I can seat 4 people, but since this is the prep side, I didn’t want any chairs in the way. Instead I found counter height barstools that didn’t have a back. That way they can be tucked completely under the table and out of the way when not in use. Then, when I have people over, I just pull them out and use them. I ended up getting those barstools at quite a deal – they were $13 each on clearance at Target.
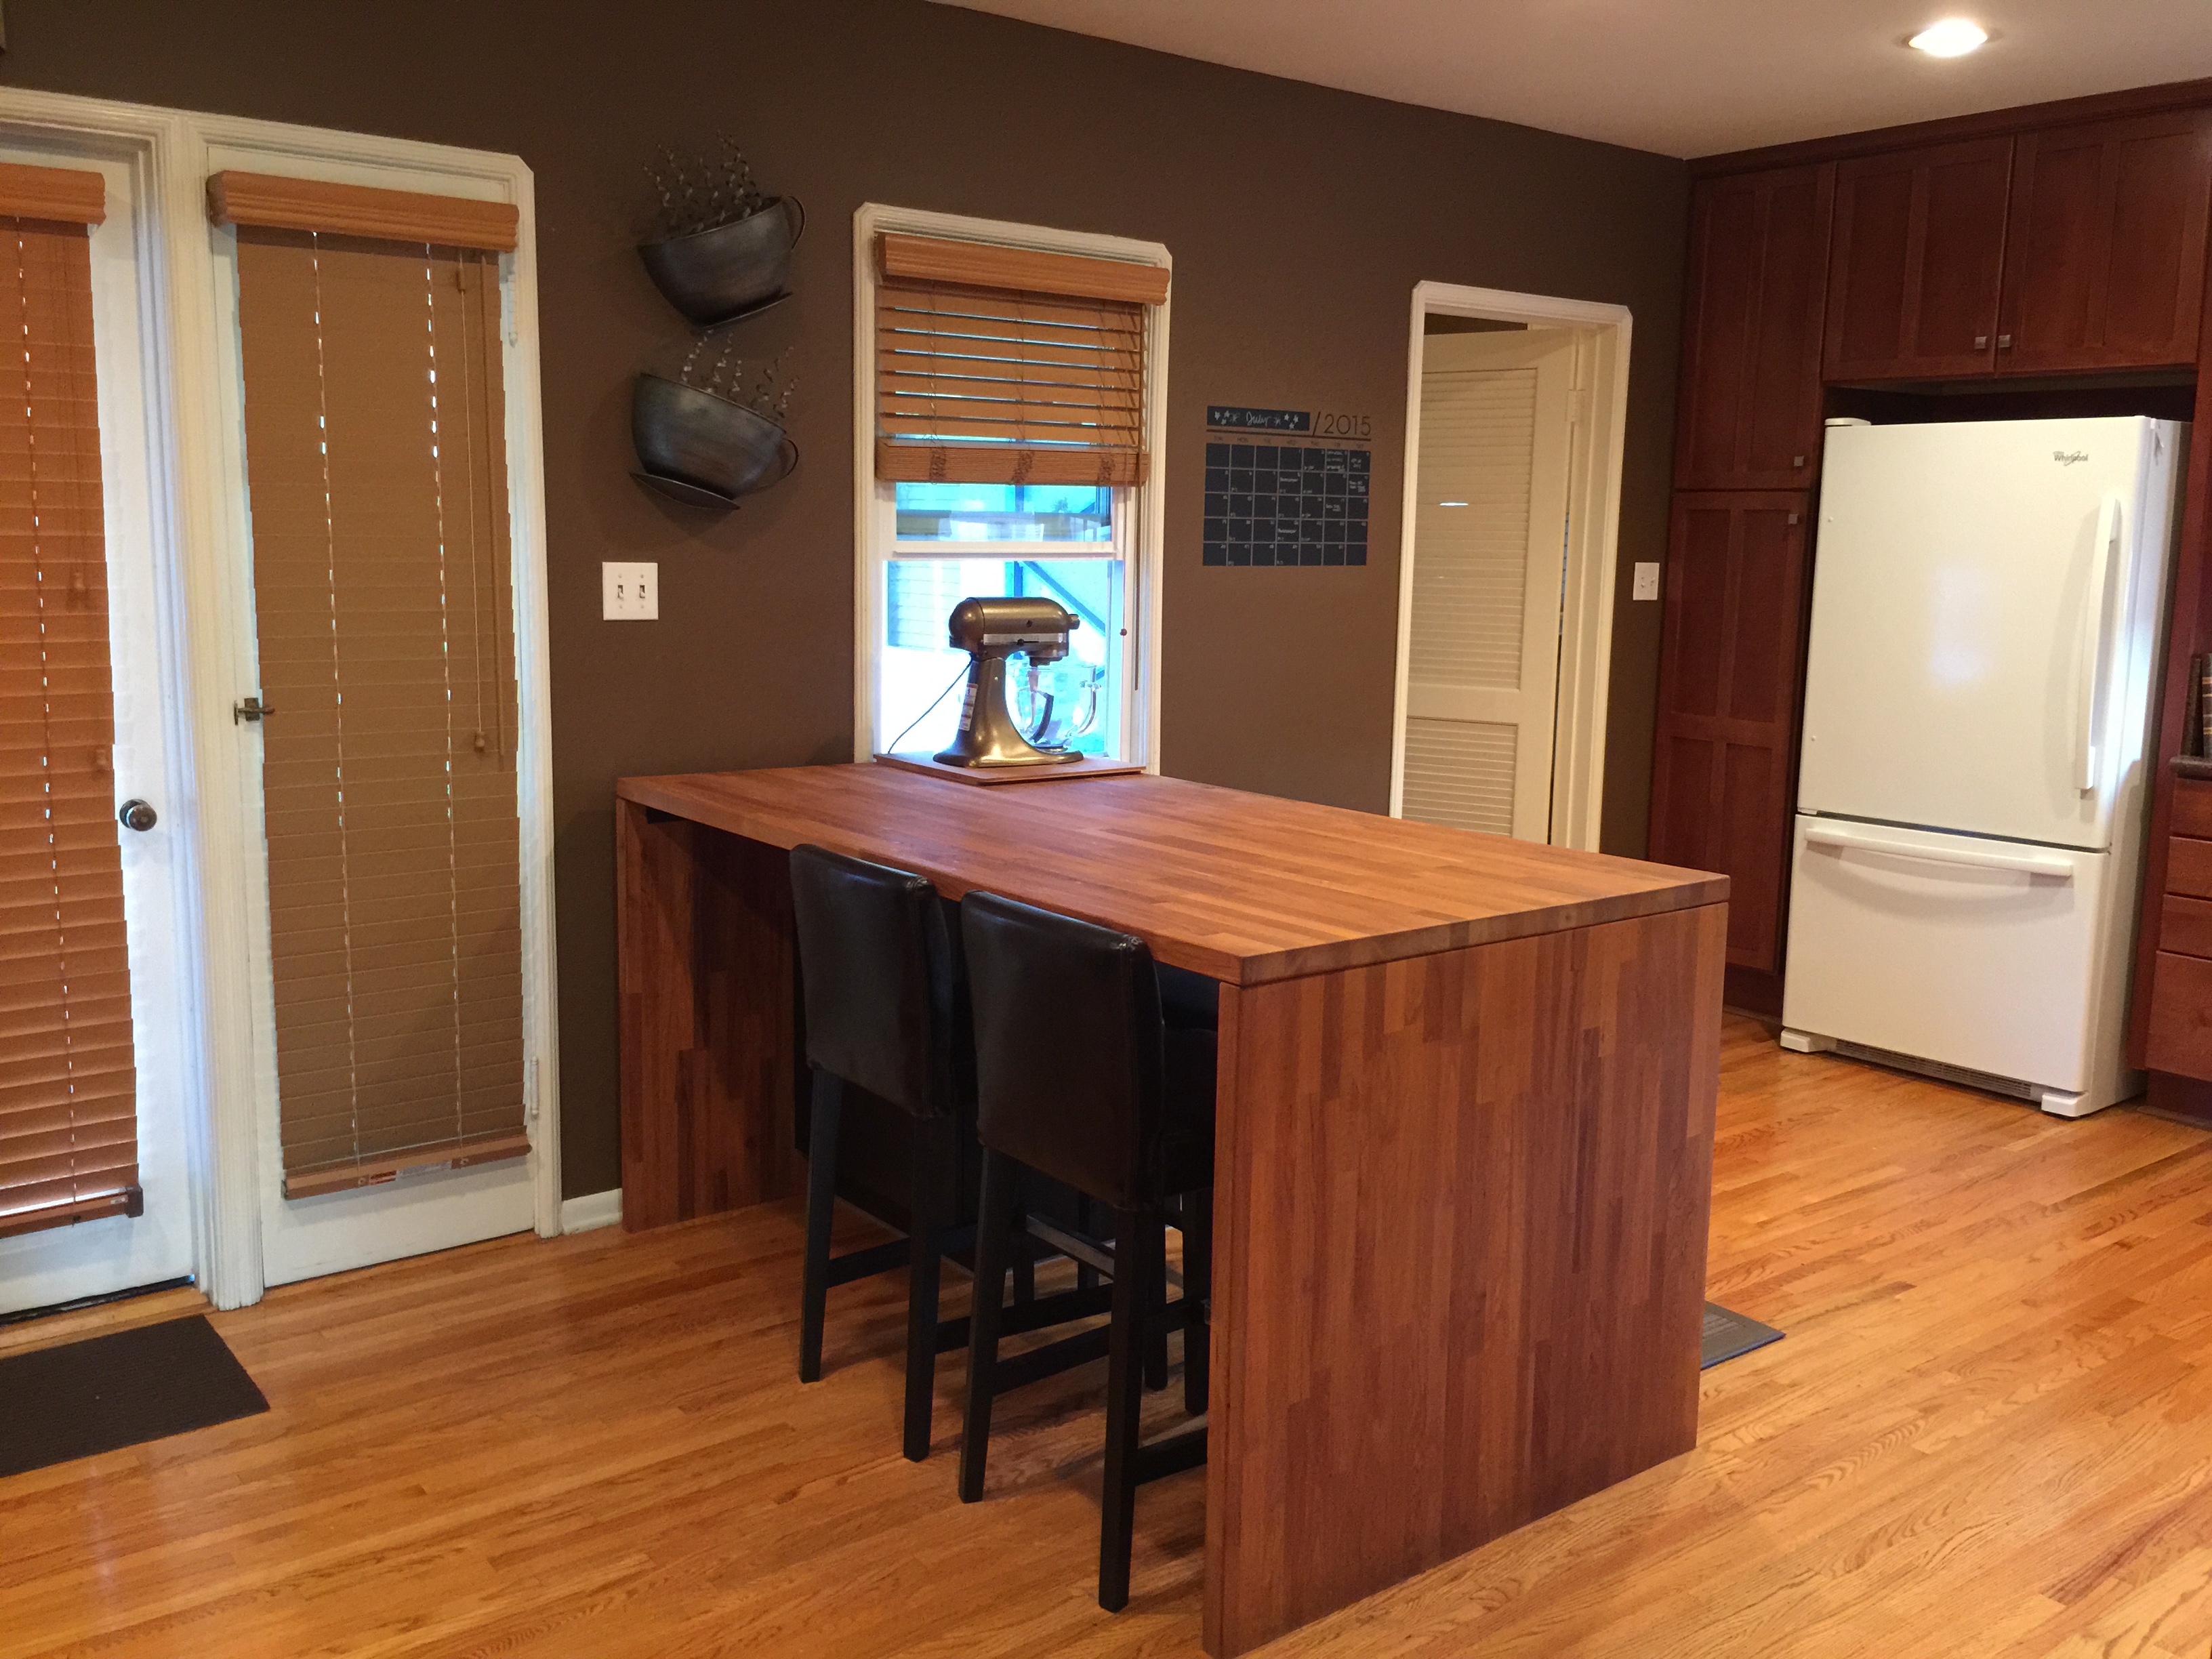
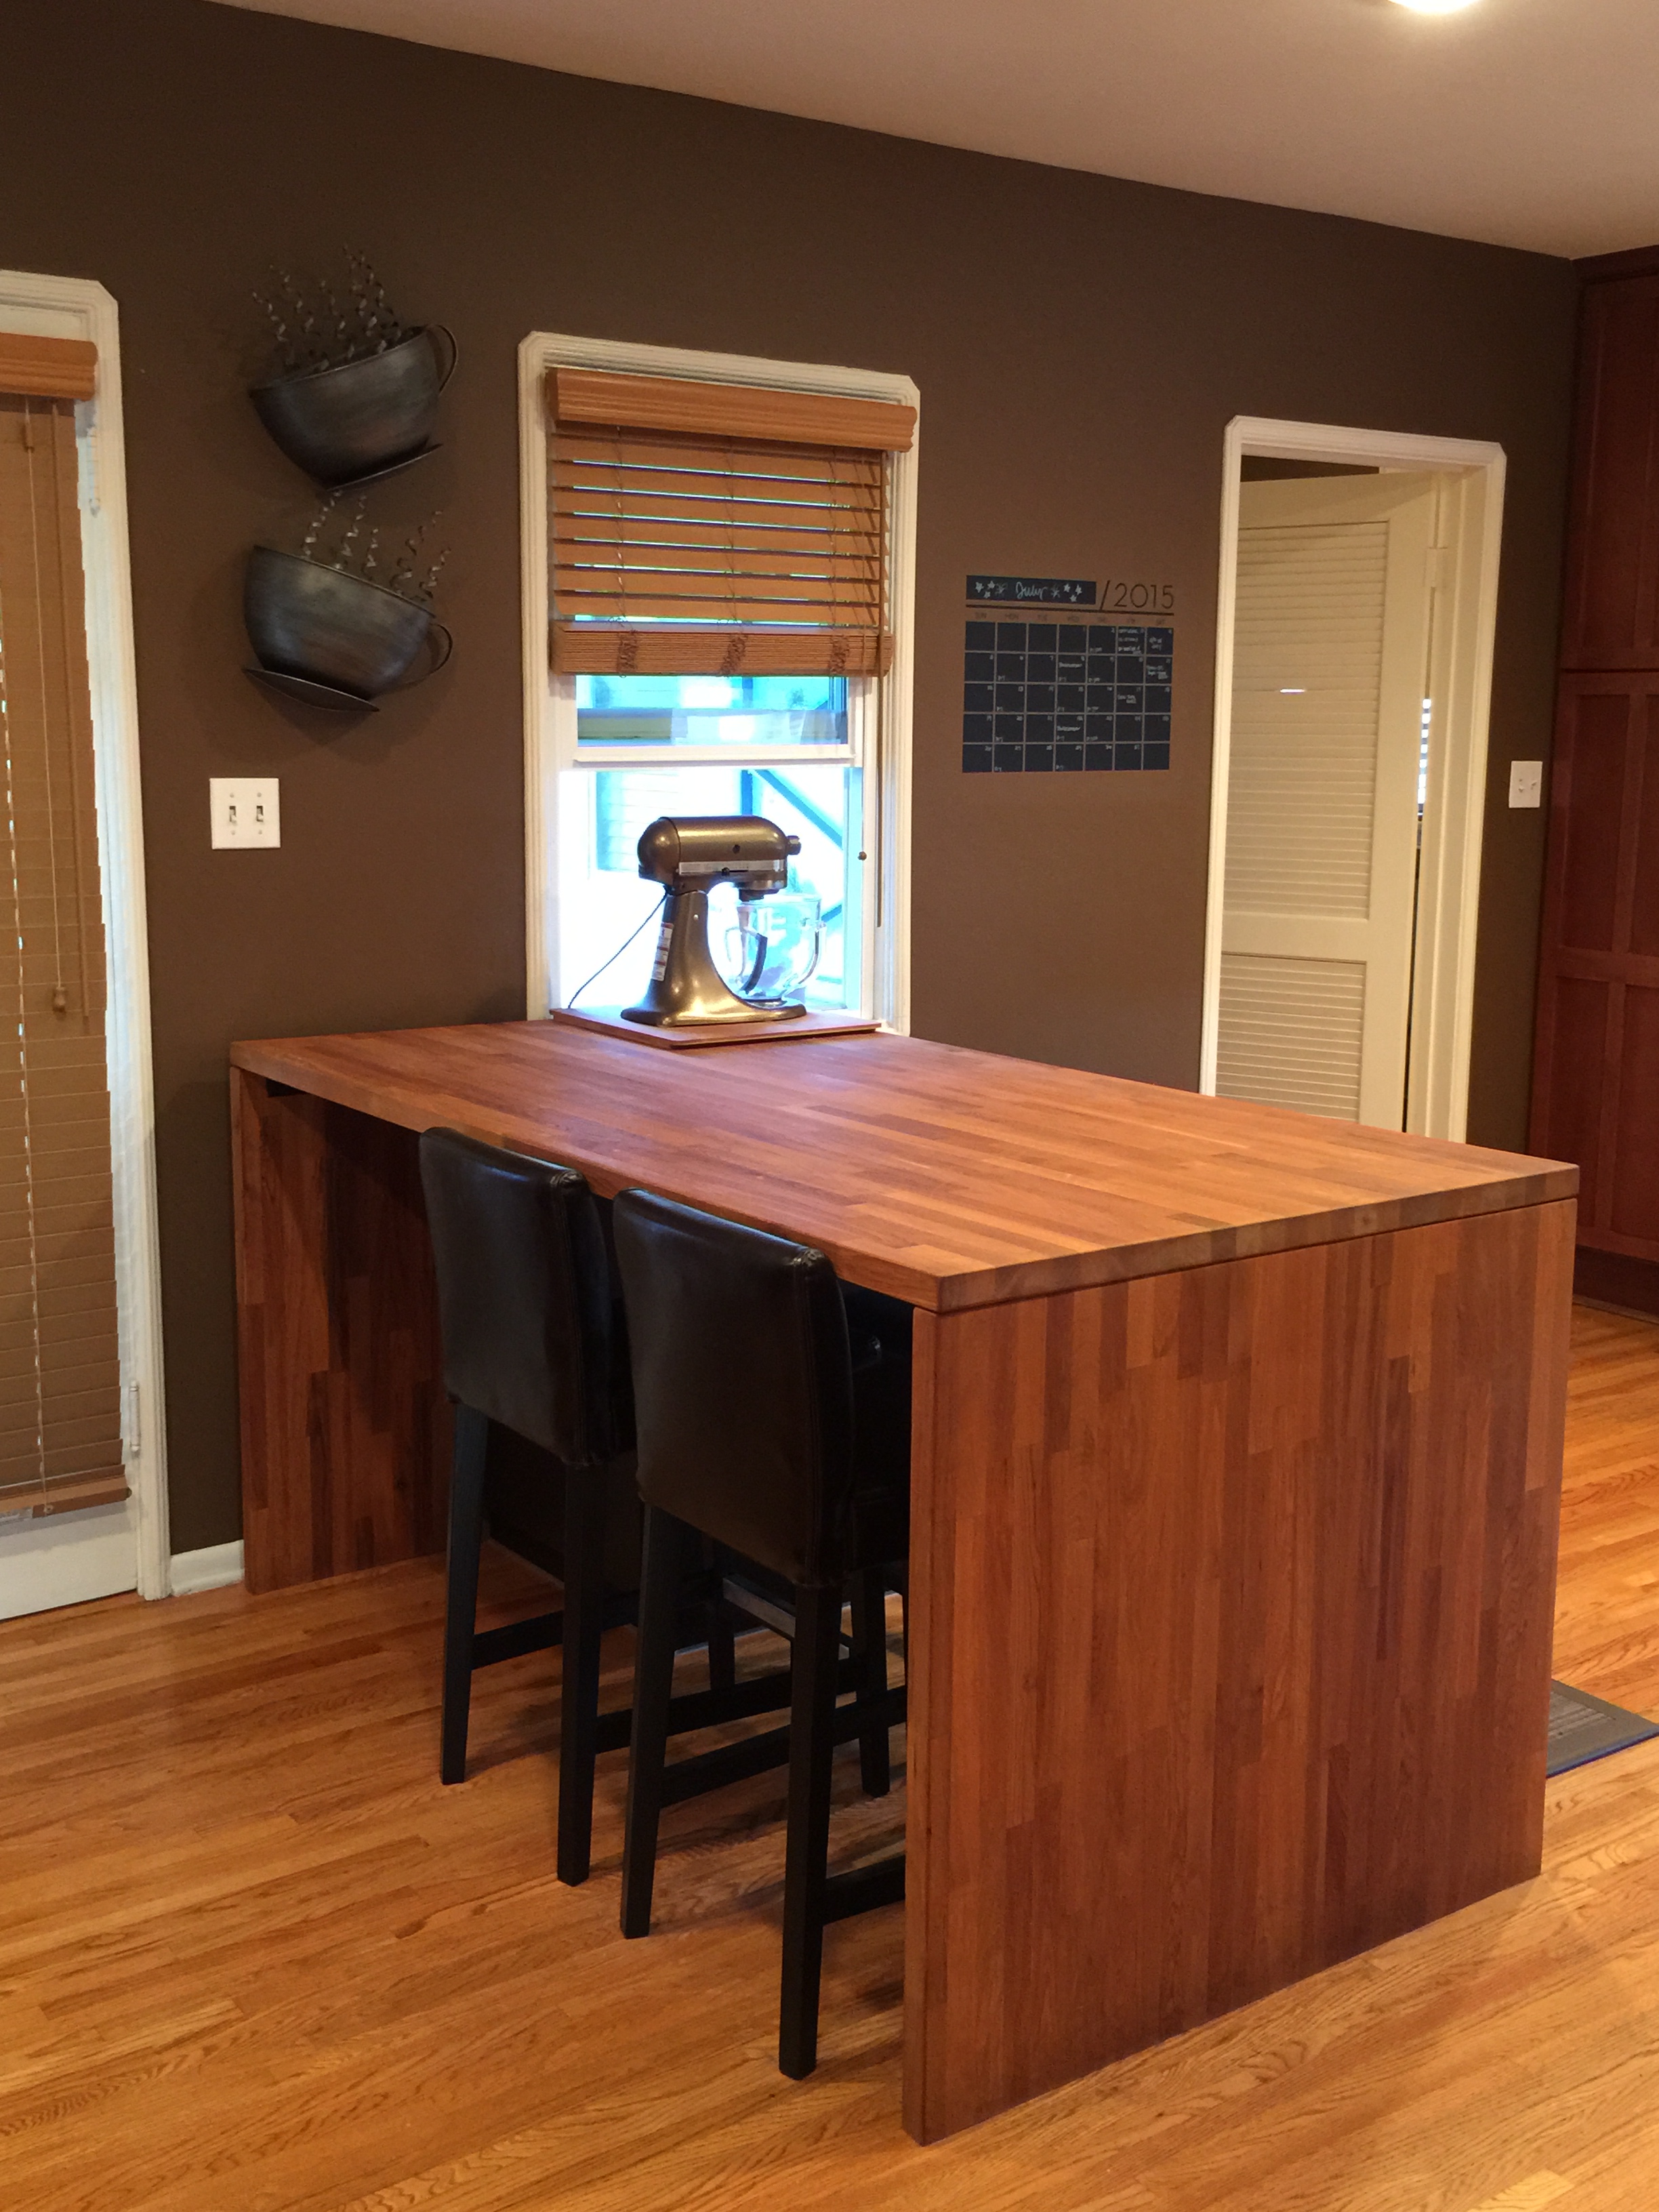
It was a happy accident, but the color of the table actually blends in perfectly with the original 1950’s flooring. It looks like it was built in to the house.
I think in the future I’ll likely add a power source and USB ports to the table, so that I can easily plug in phones and laptops when I’m using the table as a desk.
I get tons of compliments on the table. It completely compliments the space and is extremely functional. I love it when a plan comes together as you imagined it.
When I move next, I expect that I won’t likely have room in another kitchen for such a huge table – so this will likely find itself as a project table in a craft room or as a workbench in the garage. Either way – it will still work great.

Rad!!!
A word that needs a comeback! Thank you for the love!
Love it!!!!
Thank you so much! I truly appreciate the love!